Friday, March 27, 2009

Backpacks

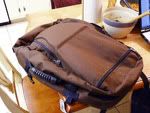
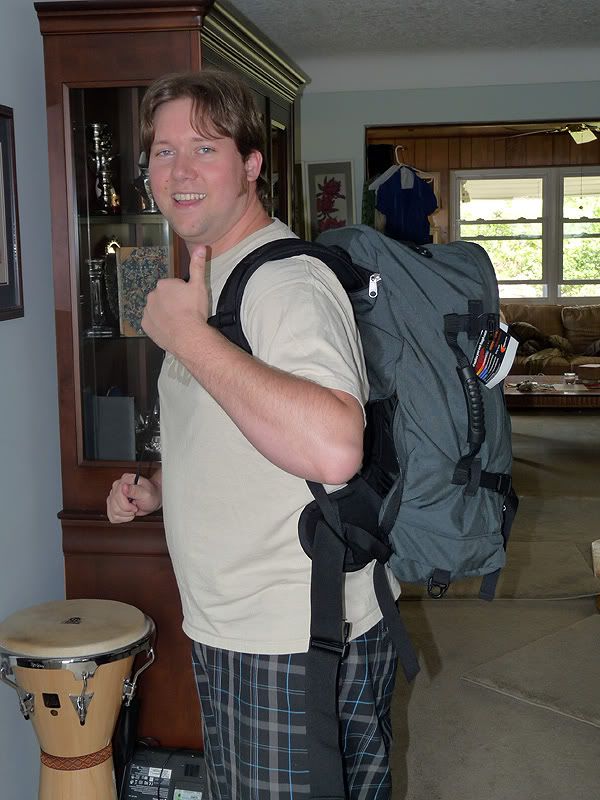
Chuck and I got our backpacks recently! This means that our trip is almost here. We're really going to be getting on a plane on April 1st and heading to England. That's just crazy... But one step at a time! We're on the backpacks step right now. Let's just focus on that.

So we did a test run with the backpacks to see if we could fit everything in. We have been using a website called One Bag for all our packing needs. They have a checklist of items they recommend having and in some cases recommend certain brands that they've found to be the best. They also suggest using the bundle method to pack everything in the backpack (you can find more info at the one-bag website), so that's what we did. It worked great as far as I'm concerned! In fact, I have room to spare in my bag. I could bring a few more shirts or an extra pair of pants if I want. Chuck's was a bit tighter than mine, but he even had a bit of room to spare. So it was a good test run.

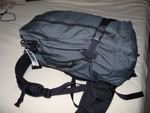
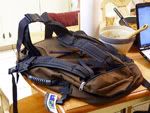
If anyone is interested, we got MEI Voyageur Backpacks. They're a tad pricier than say...your average school backpack, but a great investment for a year-long trip around the world. And I really like how the straps can all be hidden away so that it looks like a duffelbag or something similar. You can see it with the strap out in the center picture and with the straps all zipped away in the last photo. Very cool.

And as I already said, we're leaving for London on April 1st. Only five days away! It's really quite surreal. But very exciting! So we'll be updating as the days and weeks go by!


Tuesday, March 17, 2009

Vocal Recitals

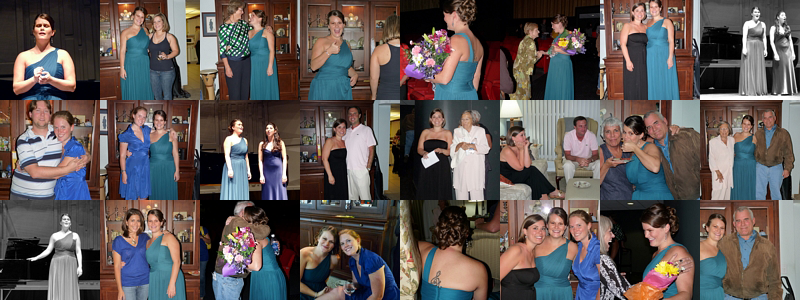
It is that time of year that Florida Atlantic University's music program is putting on all their Junior and Senior music recitals before the summer break. So I was lucky enough to get to see my friend Gigi's Junior performance and my sister Robyn's Senior performance.

Gigi had a dual performance with Rose which was really beautiful. Gigi is so expressive - she's very enjoyable to watch as well as listen to. It was really great! I'm so glad I got to see her sing!


And Robyn's performance was great too, of course. She's just amazing. I can't put words to it so I won't try. Just know that she's incredible. And after all the recitaling we had a get together back at Mom's house. Family came down to see her perform so it was a full house with all the family and friends. It was really nice though! It's good to be around a bunch of people sometimes.


Saturday, March 14, 2009

Sunrise: Cocoa Beach

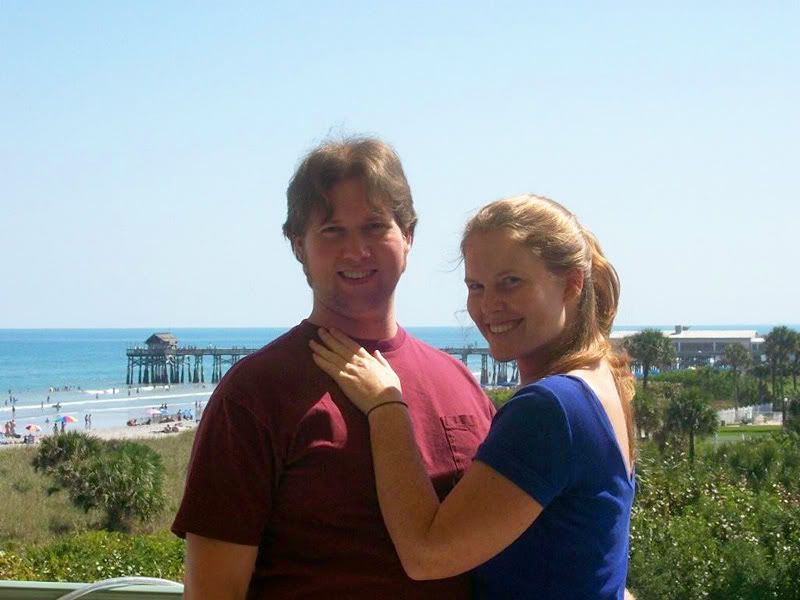
So we've spent the past few days in Cocoa Beach with Chuck's family. We won't be seeing them for another year, at least - that is if all goes as planned - so we're trying t fit in some family visiting before we head out to England. Let me tell you how beautiful it is here in Cocoa. It is SO beautiful! And relaxing. It's like a vacation. Living here would be like a never ending vacation (well, except for the whole going to work part). There are a number of good places to eat here too. Chuck and I are always into the eating thing...

Our favorite place so far is Slow & Low BBQ. Oh man, they have some good mashed potatoes, green beans, baked beans, pulled pork, garlic toast, and more. Highly recommended!

And Oh Shucks is good too. It's a great location: right on the sand of the beach, next to the pier. Looks like a great place to get a refreshing daiquiri or margarita as well.


And can't forget the Sandbar - one of Chuck's parents favorite places. Monday night is Mexican Mondays where if you buy a pitcher of beer you get a free order of nachos! Wooohoo! Actually, the nachos are pretty good. Wow, this really looks like a tourist's food guide to Cocoa Beach... Better move on to the actual topic of my post.

So since we arrived in Cocoa Chuck and I have been saying we need to get up and watch the sun rise over the ocean. It's hard to wake up early while on "vacation" so we didn't manage to do it until our last day there. But it was gorgeous! It's amazing how quickly the sun pops over the horizon once it begins the show. I mean, if you look away from the spectacle for five minutes it's over! It was really lovely though. We have thoughts of trying to see sunrises and sunsets all over the world on our upcoming trip. We'll see how that goes though...hehe.


Friday, March 13, 2009

Community Garden

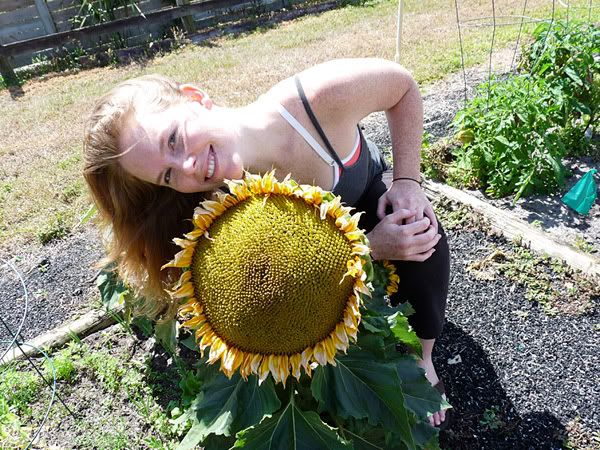
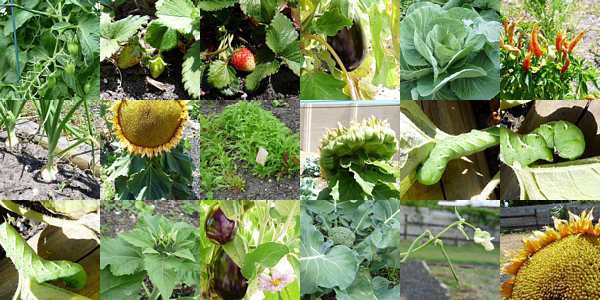
So my Mom has a plot at the local community garden. I like to go over there every once in a while and see what's growing, and what's been picked, and what's dying. So we went over there the other day and checked out the different goodies that are growing at the moment. It was so full of life! There were eggplants, onions, green peppers, hot peppers, cabbages, squash, strawberries, green beans, peas, tomatoes, sunflowers, etc. And one of those sunflowers was huge! As big as my head, as you can see. It's really quite cool to have this garden in the middle of the Florida heat growing all these wonderful things. All the love and care that goes into it is nice to see.

We also saw the most monstrous caterpillar I have ever encountered. That sucker was 5 inches, at least. He was all soft and pudgy looking, but I wouldn't even think of touching it. I bet there are some places in the world he would be a delicacy though... They'd pluck him off his leaf and chomp him up. Eww. I try to be be culturally open-minded, but...eww. We did figure out what he was though (google is the best). He's a Manduca sexta, or a Tobacco Hornworm. They turn into a big brown moth after they pupate (which I don't think is a real word). One part creepy to three parts cute, but really cool to see.


Thursday, March 12, 2009

Eggplant Shepherd's Pie


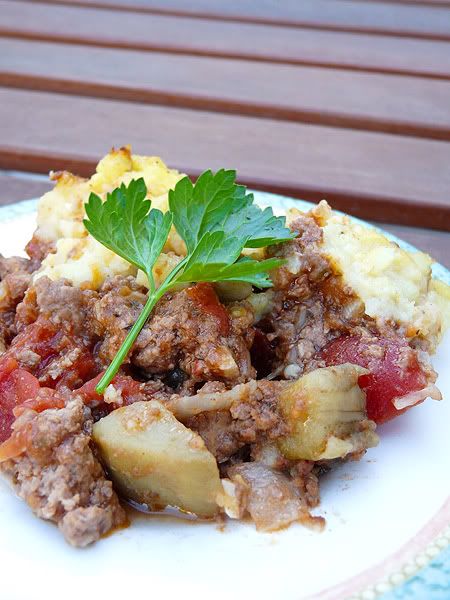
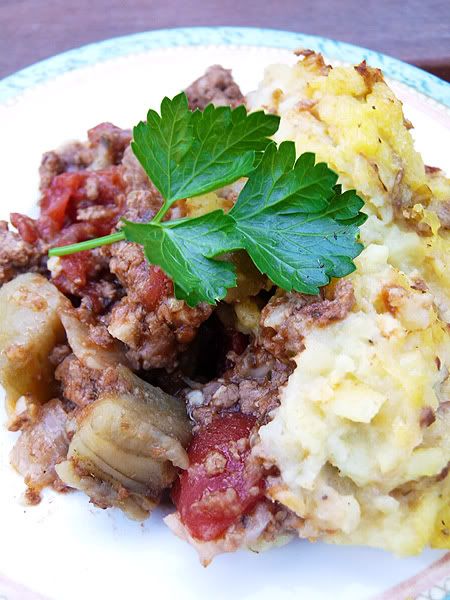
Mom got some ground lamb and planned on making regular old Shepherd's Pie, but wasn't happy with the recipe she has. I happened to notice this little Greek twist on the dish linked to on my Yahoo homepage and mentioned it. She thought it sounded good so we decided to try it out. Good choice! I love the eggplant in this, by the way.

Notes
  1. I used ground lamb even though the recipe calls for lamb shoulder cut into chunks. I think I would use the shoulder next time though, because the recipe has you brown the pan while you're sauteing it making a nice delicious gravy base for the sauce. It's not so easy to brown ground lamb, not to mention the excess fat that ground lamb leaves behind.
  2. Instead of kasseri cheese we got a chunk of provolone and grated it. And don't get the sliced cheese! Provolone slices are completely different than the chunk!
  3. Be sure to give yourself a good few hours prep time because it takes just about the whole afternoon to get this dish ready.
The Verdict

I personally thought this was pretty delicious. The potato topping was great! I think I might use the topping recipe for mashed potatoes next time I make them. And the gravy sauce had a really nice, complimentary flavor. Mr. C appears not to be a fan of lamb, so although he thought it was good he wasn't the biggest fan. Finally, Mom thought it was good. and had some for lunch at work the next day.

I found the recipe on Epicurious in their Bon Apetit section, submitted by Jeanne Thiel Kelley:

Ingredients
  • 1 1 1/2-pound eggplant, cut into 3/4-to 1-inch cubes
  • coarse kosher salt
  • 7 Tbsp (or more) extra-virgin olive oil, divided
  • 2 lbs well-trimmed boneless lamb shoulder, cut into 1-inch cubes
  • all purpose flour
  • 3 cups chopped onions
  • 1 cup dry white wine
  • 1 28-ounce can diced tomatoes in juice
  • 3 cups beef broth (preferably organic)
  • 8 garlic cloves, chopped
  • 1 Tbsp dried oregano

  • 2 1/2 lbs russet potatoes, peeled, cut into 1-inch cubes
  • 2 Tbsp butter
  • 2 Tbs extra-virgin olive oil
  • 2 garlic cloves, minced
  • 3/4 cup whole milk
  • 1 1/4 cups (packed) coarsely grated kasseri cheese (5 to 6 ounces)
Makes about 8-10 servings.

Directions
  1. Filling: Scatter eggplant on rimmed baking sheet. Sprinkle with coarse salt; let stand 1 hour, tossing occasionally. Rinse eggplant and pat very dry.
  2. Heat 3 tablespoons oil in heavy large pot over medium-high heat. Add eggplant and sauté until tender, about 12 minutes. Transfer to medium bowl.
  3. Sprinkle lamb generously with coarse salt and pepper, then dust with flour to coat. Heat 2 tablespoons oil in same pot over medium-high heat. Add half of lamb. Sauté until browned, about 8 minutes. Transfer lamb to large bowl. Repeat with 2 tablespoons oil and remaining lamb. Transfer second batch of lamb to the large bowl.
  4. Add 1 additional tablespoon oil to same pot, if needed. Add onions. Cover and cook over medium-low heat until very tender, about 10 minutes (bottom of pot will be very dark). Add wine to pot. Increase heat and boil until wine evaporates, scraping up browned bits, about 5 minutes. Add tomatoes with juice, broth, garlic, and oregano and bring to boil. Add lamb with any accumulated juices. Cover; reduce heat to low and simmer 1 hour. Uncover and continue to simmer until lamb is very tender and gravy thickens slightly, about 45 minutes. Stir in eggplant. Season with salt and pepper. Transfer to 13x9x2-inch glass baking dish. DO AHEAD: Can be made 3 days ahead. Cool slightly. Cover and chill.

  5. Topping: Preheat oven to 375°F. Cook potatoes in large pot of boiling salted water until tender, about 14 minutes.
  6. Meanwhile, melt butter with oil in medium saucepan over medium-high heat. Add garlic. Sauté until fragrant, about 1 minute. Add milk and bring to simmer.
  7. Drain potatoes. Return to pot. Stir over medium heat until excess moisture evaporates. Add milk mixture and mash potatoes until just smooth. Stir in cheese. Season with coarse salt and pepper. Drop potatoes over filling by heaping tablespoonfuls, covering completely.
  8. Bake pie until filling is heated through and topping is golden, about 45 minutes.


Tuesday, March 10, 2009

Itzhak Perlman & Letterboxing

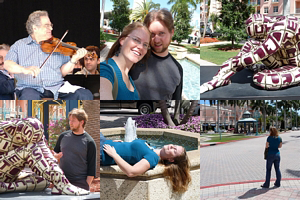
Chuck and I have been busy the last few days. Between hanging out with long time friends and making new friends we managed to go see Itzhak Perlman in a rehearsal with the Russian National Orchestra at Mizner Park. Obviously, he's an incredible violinist and it was really cool to see him playing there in front of us in just his street-clothes. Although everyone is playing the same music they would be playing for the performance, it feels a bit more personal to watch them when they're not trying to put on a show.


One of the other things I liked about it was that we got to see them actually work on the pieces. At first they played straight through everything without stopping. But after that they went back and focused on particular parts. We were too far away to be able to hear what instructions the conductor was giving to the orchestra (and I think we was speaking in Russian, so we wouldn't have understood anyways), but I think at one point Itzhak suggested a different fingering for the violin section. So they all played it the new way and scribbled their notes in the music about the change. They're just like a regular community-orchestra! Only much, much better...


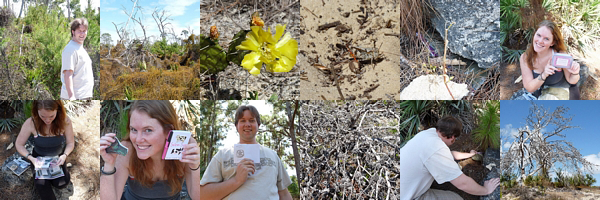
We also discovered a scavenger-hunt-like activity called letterboxing. Basically people have hidden "letterboxes" all over the country (and the world even) and list the location online. Then others can go and find the letterbox, inside of which is a stamp and a little notebook. Ideally you have your own signature-stamp that you stamp in the little notebook, and you bring your own logbook to put their stamp-mark in. Kind of like signing a guestbook. I know, it may not sound that exciting, but it was fun to follow the clues. Something along the lines of: "Go to the 7th trail marker. Turn left and go to the big rock. Continue past to the lone palm tree. Go left to another big rock." Etc


We went to find the Salem Sue box that was hidden in the High Ridge Scrub Natural Area. We've driven by the park a couple of times, but never actually stopped. It's mainly a habitat for Gopher Tortoises, but houses lots of other critters too (like grasshoppers, which were buzzing around us at every step). It was surprisingly pretty. "Natural Florida" landscape doesn't sound like it would be very nice, but it has it's own charm and beauty - if you can get past the heat. So hot! So not only did we find a letterbox, we explored an area we might not otherwise have thought of visiting! I think that alone makes it worth it.


Thursday, March 5, 2009

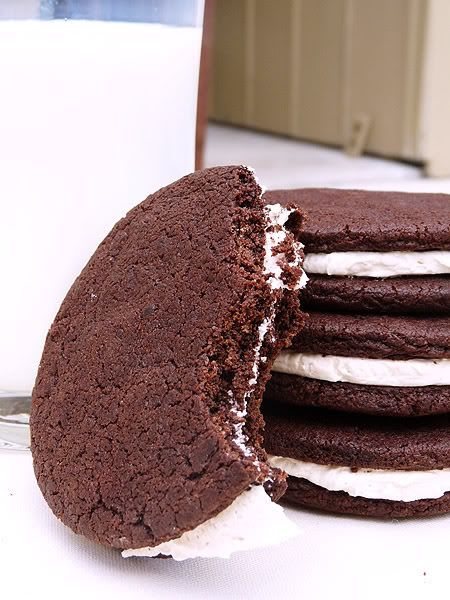
Homemade Oreo Cookies


Although this blog will be temporarily turning into a travel blog, I have plans to squeeze in a few more recipes before the plane takes off. I have a month to do almost nothing, and so far I have turned to cooking to keep me occupied. I made a delicious Penne with Mushroom Marinara dish just the other night (although I replaced the chicken with Italian Saugage, yum). And these Tangerine Cupcakes have been marinating in my brain for a couple of days now. And last night I went ahead (at the urging of my boyfriend) and made some imitation Oreo Cookies!

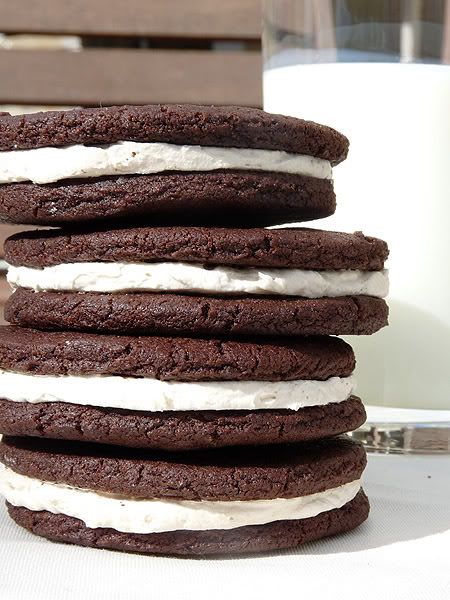
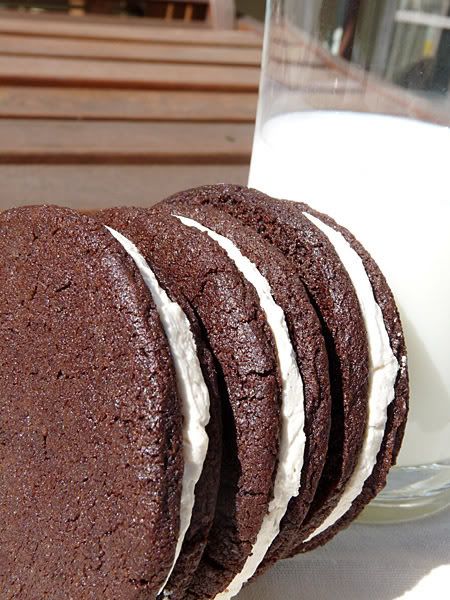
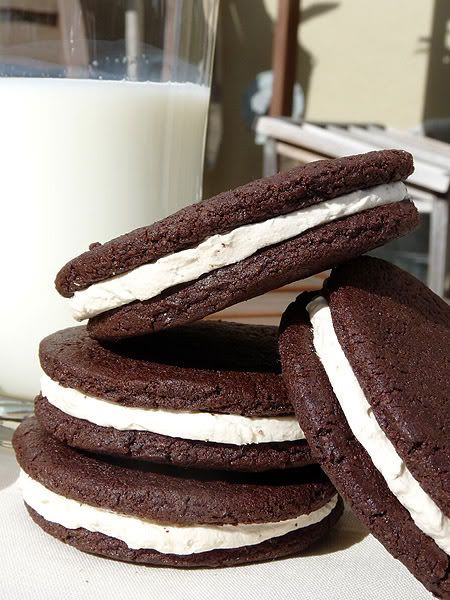
They were fun to make once I got past the butter dilemma, which I will detail for ya'll in the notes section. I made mine nice and big - mainly because I didn't have any small cookie cutters. Actually, I didn't have any cookie cutter and had to use the opening of a wine-glass. It worked out pretty darn well though. And now I can make my own, much healthier Oreo (at least in regards to the trans-fat issue - they're still dripping with calories).

Notes
  1. I suggest using an actual stick of butter with Tbsp markings on it. I thought I would be able to just measure out spoonfuls of soft butter in a regular tablespoon, but that left me with a very dry bowl of cookie mix. I ended up adding more butter until it looked right. And "right" was when the mixture mostly stuck to itself while mixing, and I could easily pack it into a greasy little ball in my hand.
  2. I didn't have any shortening for the cream filling so I just used butter. All butter and no shortening still makes a good cream filling. I also added the powdered sugar bit by bit until it was the consistency that I wanted.
  3. I suggest actually using an electric mixer to mix the filling. I mixed by hand at first and was disappointed at how flat and dense it was. After a couple minutes of beating with the mixer it was a bi lighter and fluffier. Not a huge difference, but enough that it was worth it to me.
  4. Shaping the cookies: I did not use a rolling pin. Instead, I took one handful at a time and pressed it to between 1/8 - 1/4" on a sheet of tin foil (make sure your tin foil is sized to fit on your baking sheet). Then I took my make-shift cookie cutter (ie: wine glass) and pressed it in, twisting a few times to break through those pesky sugar crystals. Peel back the remaining dough and use it for your next cookie. Once your tin foil is full of cookies, slide it onto your baking tray and just cook them right there on the foil. Easy transfer and easy clean up.
The Verdict

I personally thought they were great! I mean, they don't taste exactly like an actual Oreo, but if you want a chocolate, cream-filled cookie they hit the spot. And it feels so much better to eat a homemade cookie than those preservative-filled ones at the store. Mr. C says "Delish." He actually fought me for the last bite of one we shared last night... And Mom highly approves. She even took one to work to have with her lunch today. So yes, an overall success!!


I found the recipe at the incredible Cupcake Project (who got it from Heaven is Chocolate, Cheese, and Carbs, who got it from Smitten Kitchen, who got it from a book called Retro Desserts). Phew:


Ingredients

Cookie:
  • 1 1/4 cup all-purpose flour
  • 1/2 cup unsweetened cocoa powder
  • 1 tsp baking soda
  • 1/4 tsp baking powder
  • 1/4 tsp salt
  • 1 cup sugar
  • 10 Tbsp butter, room temperature
  • 1 large egg
Cream Filling:
  • 1/4 cup unsalted butter, room temperature
  • 1/4 cup vegetable shortening (I replaced this with more butter)
  • 2 cups powdered sugar, sifted
  • 2 tsp vanilla extract
Makes 20 3" cookies, or 10 assembled cookies.

Directions
  1. Dough: In a medium-sized bowl, mix the flour, cocoa, baking soda and powder, salt, and sugar.

  2. Beat in the butter and the egg. Continue mixing until dough comes together in a mass.

  3. Take rounded teaspoons of batter and place on a parchment paper-lined baking sheet approximately 2 inches apart. With moistened hands, slightly flatten the dough. (see the "Notes" for more tips!)

  4. Bake for 9 minutes at 375 F. Be sure not to over cook them! Set on a rack to cool.

  5. Cream Filling: Place butter and shortening in a mixing bowl, and at low speed, gradually beat in the sugar and vanilla. Turn the mixer on high and beat for 2-3 minutes until filling is light and fluffy.

  6. To make a cookie, pipe teaspoon-sized blobs of cream into the center of a cookie using a pastry bag with a 1/2 inch round tip. (or, if you're like me just plop a blob of filling in the center of a cookie). Place another cookie, equal in size to the first, on top of the cream. Lightly press (I found spinning to be helpful too), to work the filling evenly to the outsides of the cookie. Continue this process until all the cookies have been sandwiched with cream.


Monday, March 2, 2009

Back at Mom's

Well, we are all moved out of our apartment now. It was a big task, but we're finally finished. Thank goodness we started packing boxes at the beginning of February, otherwise... phew, otherwise it would have been just horrible. Really horrible.

The main problem was getting rid of furniture. We didn't manage to get rid of the couch until our last night in the place. And the only reason we finally did get rid of it is because we had Dad's truck (thanks Dad!!). And I think I accidentally scratched a cop car while dropping off the couch. I somehow managed to throw my car keys across the parking lot right at an undercover cop car while yanking couch cushions out of the truck. I like to think I was sticking it to the Man, yeah!

We ended up making about three full trips with the truck, so thank goodness Dad let us borrow it. We would have been up a fecal-infested river without any means of maneuverability if we hadn't had that truck. It's amazing how much stuff one accumulates. And we were so kind as to drop off eight garbage bags full of various random things to Goodwill. Although it's probably more accurate to say that Goodwill was kind enough to take eight bags of crap off our hands.

Last of all we cleaned our little hearts out of the apartment. Thanks go to Mom for coming down and helping out. She scrubbed that stove clean! There were some spots we cleaned that I swear hadn't been touched in the past 10 years. And I say the worst part was mopping the whole place with our sub-par mop. We had to run back and forth to the kitchen sink, scrubbing the dirt and hair off of the old, used Mr. Clean scrubby pad. Why oh why must I shed so much?? But after about an hour we finished that final job, said goodbye to the place, and got the heck out of there.

And boy were we sore the next day. We're still sore (at least I am) two days later. And there's still a bit more work to do (like selling my sister's old bed that was replaced with our one-year-old bed). And there's a ton of stuff to put up on Ebay.com or Half.com. But we're one step closer to leaving time! One step closer to our big adventure!


Wednesday, February 25, 2009

World Trip

Okay, now that all the shat has hit the fan I feel comfortable enough in sharing mine and Chuck's big plans. We are taking a trip around the world! Woohoo! No, really, we are. Yes, around the whole world. Well, minus Antarctica for now. At least that's the plan. And of course, when the money runs out we go running home. But until then the plan is to travel through Europe, some of Africa, definitely Asia, Australia of course, and if we're lucky we'll make it to South America. And hopefully my sister Robyn will be able to join us at some point along our trip (she has some other obligations she needs to attend to before abandoning the real world to go on walkabout).

We have saved for a while, not knowing what exactly we were saving for. Sometime last year the travel bug bit us. Then at the very beginning of this year we realized that now is as good a time as any to drop everything and travel. I mean, we have no kids, no house, just bit of furniture, no real obligations beyond a couple student loans. So why not now??

We have our tickets to London for April 1st. Right now we're moving out of our nice condo (which will be missed) and staying at my Mom's house for the next month. It's stressful preparing for such a big adventure. And that doesn't include preparing an itinerary! We have no plans - we'll just go where the wind blows us. If we feel like up and going to Milan one day, then we'll do it. If we feel like staying for three weeks in Osaka, then we'll stay. Sounds so nice...
Needless to say we are excited! And nervous. We're hoping to be able to share our journey with the rest of the world (ie: family and friends) by keeping a little blog. Who knows how often we'll manage to update, or how often we'll feel like updating, but we'll do what we can. That's it for now! I'l be back again as we get closer to leaving time!

Monday, February 2, 2009

Exciting News!

I have exciting news to share with the world!! I'm not going to share just yet, as some things need to be taken care of before the whole world knows. And by whole world I mean my tiny, uncharted, undiscovered corner of the internet that I have here.

So stay tuned for more details in about two weeks. And no, I'm not pregnant...


Thursday, January 8, 2009

Bronze Spirals

These earring were time-consuming to make. As you can see, I spiral-wrapped the entire frame of the earrings... I'd never done any wrapping quite as thoroughly as this pair so it was new territory for me. I would fix or change things the next time I made a pair in this way, but I really love these earrings (I usually am fond of a first-time creation). The colors are so Autumny and rich. And if you admire them from a distance you can't see all the flaws! So don't get too close, k?


Saturday, January 3, 2009

Icicles

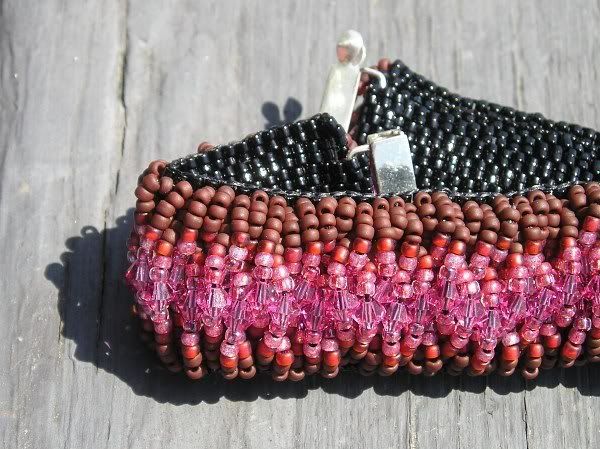
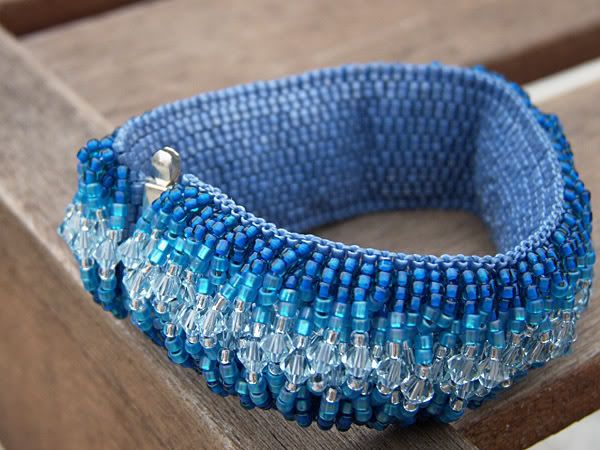
I made my sister this icy bracelet for her Birthday this year. It is a blue version of my Pink Caterpillar bracelet I made a few years ago. It's a very thick piece with a ton of Swarovski crystals woven in - very weighty. I don't find much occasion to wear my own pink one, but my sister is much more stylish than me and knows how to make it look good. Since she mentioned that she liked it (well, ok, she outright said "You could make me one of these in green or blue" as she help up the original) I decided to make her the Icicles. I had a helluva time picking out the right color combo as I did all my shopping online, but I think it turned out to be a pretty good blend in the end! I was going for the icy look and I think I achieved it. And most importantly, she seemed to like it!

Oh, and to be fair I have to mention that I found the pattern/instructions for this piece in the April 2006, Issue 72 Bead & Button magazine. Unfortunately I'm not so talented as to be able to spontaneously come up with amazing bead-weaving patterns.


Tuesday, December 30, 2008

Sugar Cookies


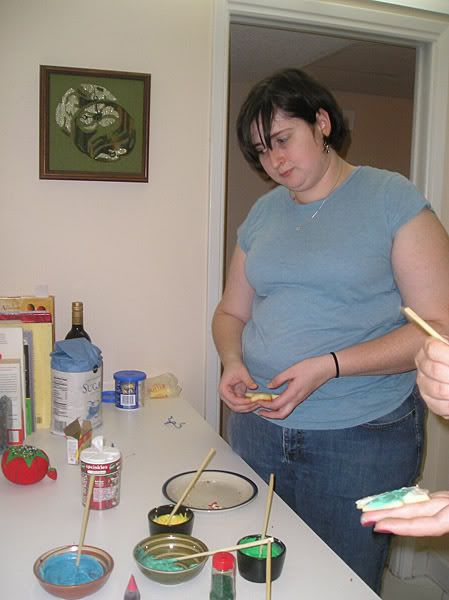
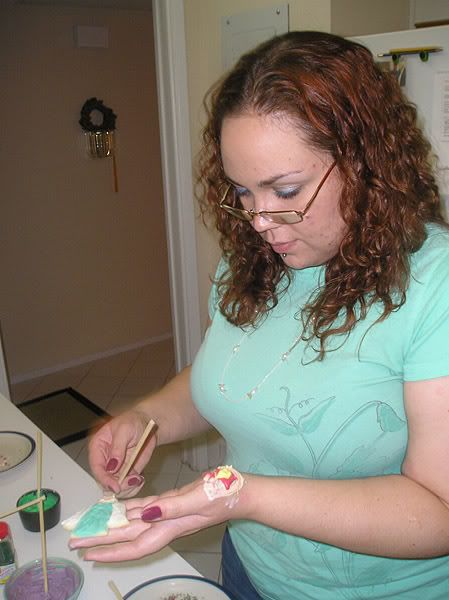
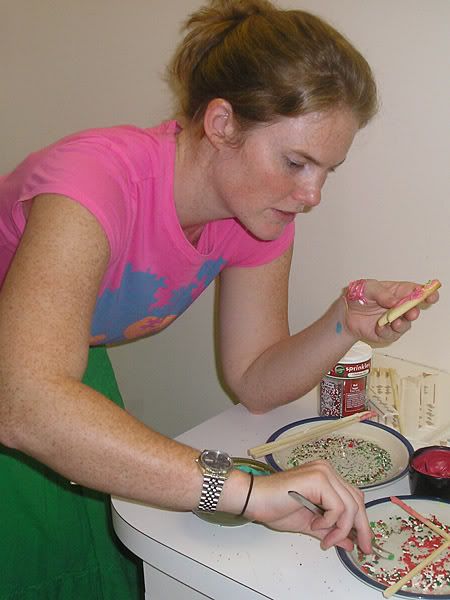
So for the lovely month of December I did as I have done for the past two years and had myself a Cookie Decorating Party. Well, it wasn't quite a party - more like a small gathering I suppose. But that's beside the point! I had friends over and forced them into slave labor not only by making them bake and decorate cookies, but also by making them decorate my tree!! They liked it though, I'm sure.

But really, this time of year is the time to get together with friends and family and I was really grateful to have my friends close by me this year. The past three years I had been in California, where I developed what I'm now calling my Cookie Decoration Tradition with Mr. C. I am very happy to be able to share it with some more of the very special people in my life!


So yes, Dela, Jessica and I slaved away in the kitchen stirring up the dough, rolling it out, cutting little cookie shapes. Then after they were baked and cooled the truly challenging part came. One never does realize how few creative ideas one has until they are confronted with 30 or so cookies to decorate. Let me tell you, it's daunting. I usually start off with a couple of bland creations as I warm up to the task. Then I pop out a few really snazzy, dazzling cookies and am suddenly left drained of inspiration. That's when I just slather on some icing, toss a few sprinkles and call it done. They all look great lined up on the tray no matter what though! By the way, pictured to the right are two of my more amusing creations: the top cookie is me, middle is Dela, and the bottom is Jess (she made that one). Anyways, the true purpose of this blog entry is to share with you the wonderful recipe for sugar cookies that I have successfully used thus far, so I'll move on to that part.

Notes
  1. The cookies retain their shape and size while baking - they won't spread or get poofy, so make them pretty before you pop them in the oven!
  2. I don't recommend skipping the chilling of the dough - it makes it much easier to work with when it's nice and chilled. And to keep it all manageable I only worked with a small ball of dough at a time, leaving the rest to stay cool in the fridge. After I rolled it out and cut some cookies once, I balled up the scraps, put the back in the fridge and pulled off another ball of already-chilled dough. Rinse and repeat.
The Verdict

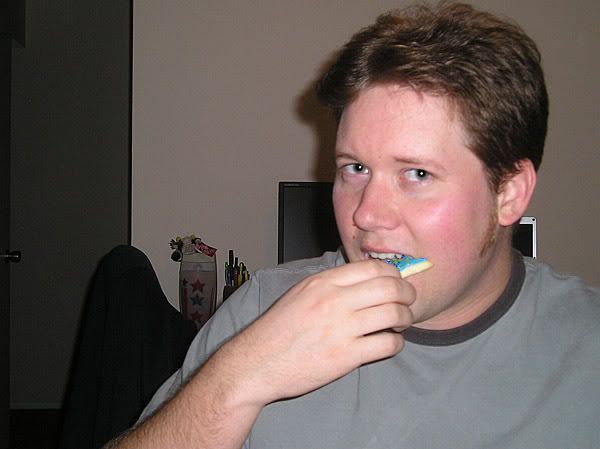
Of course they were good. I imagine it's hard to mess up sugar cookies, but I do particularly like the density and texture of these ones. They're weighty enough to hold their own with a nice thick frosting slathered on top. Mr. C liked them too, as you can see to the left.
The recipe is from trusty old AllRecipes.com and submitted by Jill Saunders:


Ingredients
  • 1 1/2 cups Butter, softened
  • 2 cups White Sugar
  • 4 Eggs
  • 1 tsp Vanilla Extract
  • 5 cups All-purpose Flour
  • 2 tsp Baking Powder
  • 1 tsp Salt

  • Frosting (I bought some Betty Crocker frosting at the store, Eeeps! I'm terrible, I know!)
  • Various Sprinkles
Makes about 60 cookies (depending on how thick you roll them).

Directions
  1. In a large bowl, cream together butter and sugar until smooth. Beat in eggs and vanilla. Stir in the flour, baking powder, and salt.

  2. Cover, and chill dough for at least one hour (or overnight).

  3. Preheat oven to 400 degrees F (200 degrees C). Roll out dough on floured surface 1/8 to 1/4 inch thick. Cut into shapes with any cookie cutter. Place cookies 1 inch apart on ungreased cookie sheets.

  4. Bake 6 to 8 minutes in preheated oven. Cool completely.

  5. Slather with frosting and sprinkles.

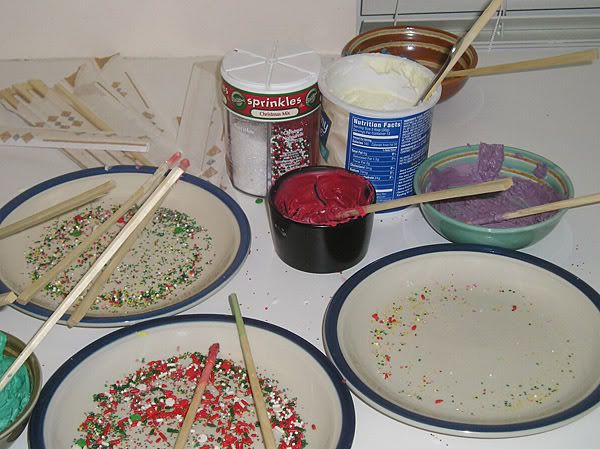
Frosting Tips: Let me share our frosting set-up. We made multiple colors of frosting by just mixing food coloring to our hearts desire with white frosting. If you need to soften your frosting a bit just stick it in the microwave for 5 seocnds (no more than 5 seconds at a time!). We used disposable chopsticks to spread the frosting as I decided butter knives would be far to unwieldy. And we put the cookies on plates when we used sprinkles so they wouldn't go all over my kitchen.


Friday, December 12, 2008

Days of Summer

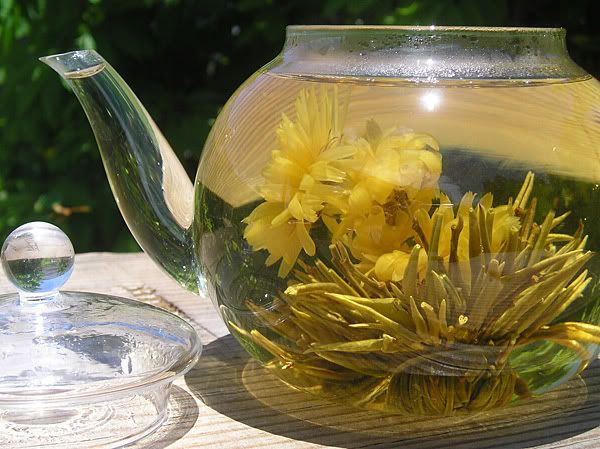
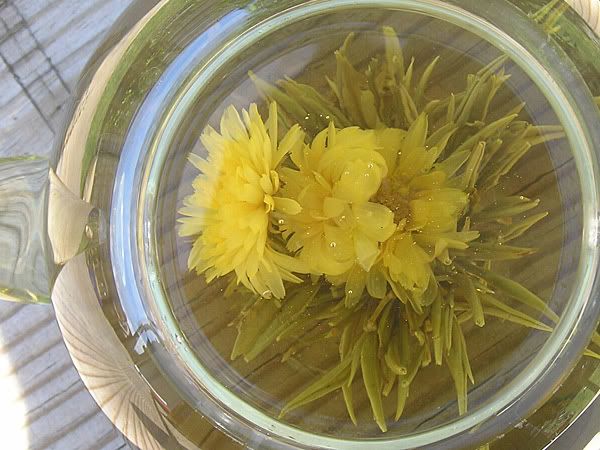
I thought I'd share some lovely pictures I took over the last summer (but have been too lazy to post until now). I love the Florida sunshine - it makes for some lovely and intense light. My favorite shots are of a blooming tea my Mom bought a while back. She got the nice clear teapot to go along with it because let's face it - what's the point of a flower in my tea if I can't see it?

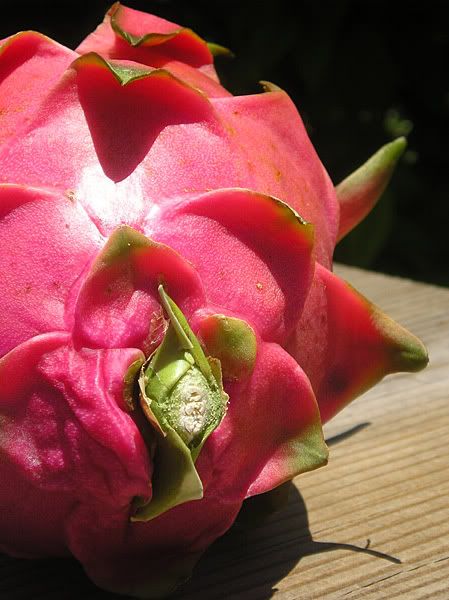
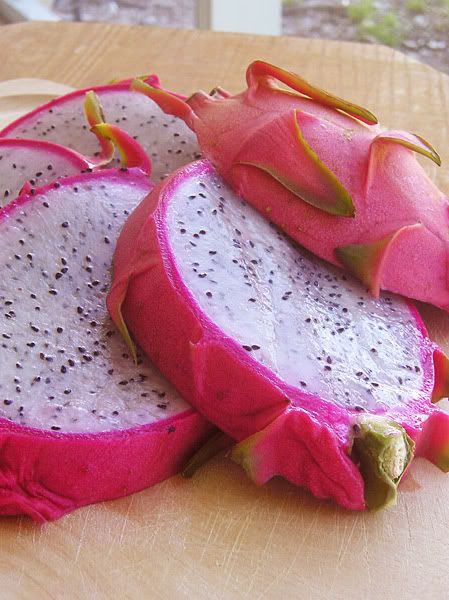
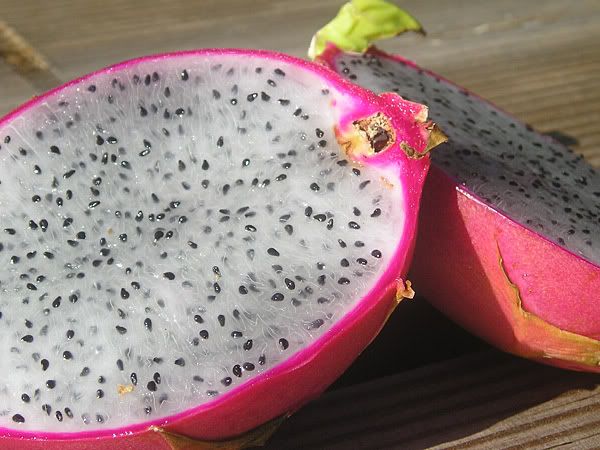
While out shopping we also ran across this lovely bright pink fruit at the Asian supermarket. Having just recently sen a recipe for Dragonfruit Sorbet I actually knew that the fruit was a Dragonfruit so we bought a couple. They're so vibrant on the outside that it's really a shock to cut it open and find a tuxedo colored black and white inside. You can eat it raw by just scooping it out with a spoon, or you can make sorbets (and other things I'm not aware of) with it. I tried making the sorbet with mine but it didn't end up so great. I blame that on a lack of an ice cream machine though... It couldn't have been my fault! No way. Nope. Not at all. Not me. Uhhuh...


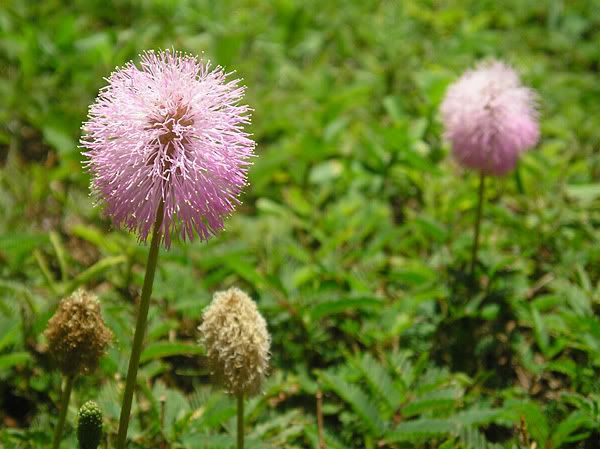
Oh, and that last one is just a cute little flower in the yard that caught my eye. I've no idea what kind of flower it is.

And those are my days of summer! Finding different things to try, flowers that make tea, pretty things growing all around, sun beating down on you. And now it is the winter (which in Florida isn't so different from the summer, although this year has actually been nice and cool). I like my days of winter too though - decorated trees and cookies, presents, food, family. Well, that's that! I'm off to make myself some tea (not the blooming kind though).


Monday, December 8, 2008

Tourmaline Cubicles

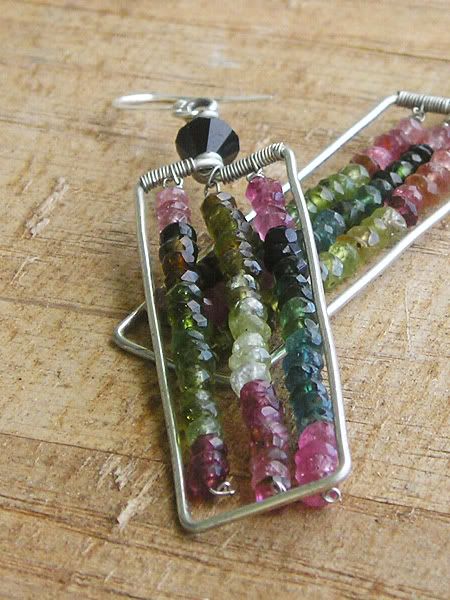
Alright, nice to see everyone again. I am back with a recently created pair of earrings. Rather simple, a little bit on the classy-business side. All together nothing too exciting but I figured I'd share anyways.

The rectangle was hand-shaped by your truly (if you looked closely you can see that it is indeed hand-shaped). The dangling stones are Tourmaline I think. I got the strand at a bead show in California quite a while ago and am just now getting around to using them so I can't exactly be sure, but Tourmaline sounds good to me. The downside to these earrings is that it doesn't take too much pressure to bend them out of shape so one has to be careful while handling or wearing them. But hey, I can always bend them back into shape I guess, so it's not so bad. Enjoy!


Thursday, November 13, 2008

Pumpkin Cream Cheese Muffins


Here is the third and final recipe from my pumpkin-treats collection. This is the best of the three with it's complex combination of complementary flavors creating a combustion of creative climax! Woohoo, alliteration is useful for more than just high school english class! But yes, as I was saying, these muffins are delicious. And easy despite requiring numerous bowls.

Notes
  1. When filling the cupcake pan I take about a tablespoon of batter and kind of spread it on the bottom and sides of the cupcake liner, leaving an empty space to dollop in the cream cheese mixture. Then I fill it the rest of the way with the muffin batter and top with streusel.
  2. Alternately, I will also fill the liner 2/3 with muffin batter and do the best I can to make a little well in the middle and fill it with cream cheese mixture. This way you can see the cream cheese before you even bite into the muffin.
  3. If you prefer a lighter muffin feel free to replace the brown sugar in the muffin batter with white sugar. Alternately, replace the white sugar with brown for a heavier muffin.
The Verdict

Delicious delicious delicious. These were by far the hit. Mr. C's boss made a point of telling him how good they were; Mr. C, my Mom and my sister both liked them best; I think they were the best of the bunch. And if one is allowed to use compliments from previous years, they were well-received at the pumpkin carving party I made them for last year. These are killer muffins! The cream cheese mixture isn't too strong in flavor and isn't mushy or anything and the streusel adds a nice sweet crispiness to the top of the muffin.

The recipe is from trusty old AllRecipes.com and submitted by Barb:

Ingredients
    Filling
  • 1 package cream cheese, 8 oz
  • 1 egg
  • 1 tsp vanilla extract
  • 3 Tbsp brown sugar
    Streusel
  • 3 1/2 Tbsp all-purpose flour
  • 5 Tbsp brown sugar
  • 3/4 tsp ground cinnamon
  • 4 Tbsp butter
    Batter
  • 2 1/2 cups all-purpose flour
  • 1 cup white sugar
  • 1 cup brown sugar
  • 2 tsp baking powder
  • 1 tsp ground cinnamon
  • 1 Tbsp pumpkin pie spice
  • 1/2 tsp salt
  • 2 eggs
  • 1 1/3 cups canned pumpkin (about 15 oz)
  • 1/3 cup vegetable oil
  • 2 tsp vanilla extract
Makes about 18 muffins.

Directions
  1. Preheat oven to 375 degrees F (190 degrees C). Grease and flour 18 muffin cups, or use paper liners.

  2. Filling: In a medium bowl, beat cream cheese until soft. Add egg, vanilla and brown sugar. Beat until smooth (although small lumps are fine), then put in fridge until ready to use.

  3. Streusel: In a medium bowl, mix flour, sugar and cinnamon. Add butter and cut it in with a fork until crumbly. Put in fridge until ready to use.

  4. Batter: In a large bowl, sift together flour, sugar, baking powder, cinnamon and salt. Make a well in the center of flour mixture and add eggs, pumpkin, olive oil and vanilla. Beat together until smooth.

  5. Place pumpkin mixture in muffin cups about 1/2 full. Then add one tablespoon of the cream cheese mixture right in the middle of the batter. Try to keep cream cheese from touching the paper cup (see notes for additional tips). Sprinkle on the streusel topping.

  6. Bake at 375 degrees F (195 degrees C) for 20 to 25 minutes.


Ok, video time. This one is great for those of you who are familiar with the little game called Minesweeper. It's hilarious in my opinion...hehe.


Wednesday, November 12, 2008

Pumpkin Cupcakes


Recipe number two! The pumpkin cupcake was very straight forward and easy to do. I topped it with my favorite hint-of-cream-cheese icing recipe which was a perfect match. It's nothing fancy, but very yummy.

Notes
  1. I've halved the original recipe here. The original makes enough for a double layer cake, but I didn't need that many cupcakes. So just double this for a cake!
The Verdict

Delicious! The frosting has just a little bit of cream cheese so the flavor isn't overwhelming. The cupcakes were moist and delicious. I loved them and Mr. C's co-workers ate all the leftover ones so I think they were a hit. I would make these again (they're right up there as a competitor to my favorite red velvet cake recipe).

I found the cupcake recipe at About.com and the frosting recipe is from (Visions of) Sugar Plum:

Ingredients
    Cupcakes
  • 1 cup sugar
  • 1/2 cup vegetable oil
  • 2 large eggs
  • 1 cup all-purpose flour
  • 1 tsp baking soda
  • 1 tsp ground cinnamon
  • 1/4 tsp ground ginger
  • 1/2 tsp baking powder
  • 1/4 tsp salt
  • 1 cup pumpkin puree or cooked mashed pumpkin
  • 1/2 cup chopped pecans (I omitted these)
Frosting
  • 1/2 cup milk
  • 1/2 cup granulated sugar
  • 2 1/2 tbsp all purpose flour
  • pinch salt
  • 6 tbsp unsalted butter, softened
  • 2 ounces cream cheese, softened
  • 1 tsp vanilla extract
Makes about 12 cupcakes.

Directions
  1. Turn oven to 350 F.

  2. Combine sugar, vegetable oil and eggs in a large mixing bowl; mix well. Sift dry ingredients into a separate bowl.

  3. Stir into oil mixture, beating well. Stir in pumpkin puree.

  4. Pour batter into a lined cupcake pan and bake at 350° for 20 minutes or so? I can't remember precisely how long it took, I just checked in on them every so often until they were done.

  5. Turn out onto racks to cool.

  6. To make the frosting whisk together milk, sugar, flour and salt in a medium sized saucepan; bring to a boil, over medium heat, whisking frequently. Continue to boil for 1-2 minutes, or until thickened. Cool in the refrigerator or freezer until completely chilled.

  7. In a large mixing bowl, using a mixer on medium speed (or just a mixing spoon like I did), beat together butter and cream cheese until creamy, about 1-2 minutes. Beat in vanilla extract and chilled milk mixture, until well combined and fluffy, about 2-3 minutes.

  8. Spread frosting over cupcakes and enjoy!

Since I added a video in my last recipe I've decided to share a few more. This is unfortunately an April Fool's movie preview (so there won't really be a full length movie, booo) but it was still really cool to see Zelda made into a movie trailer!


Tuesday, November 11, 2008

Pumpkin Chocolate Chip Cookies


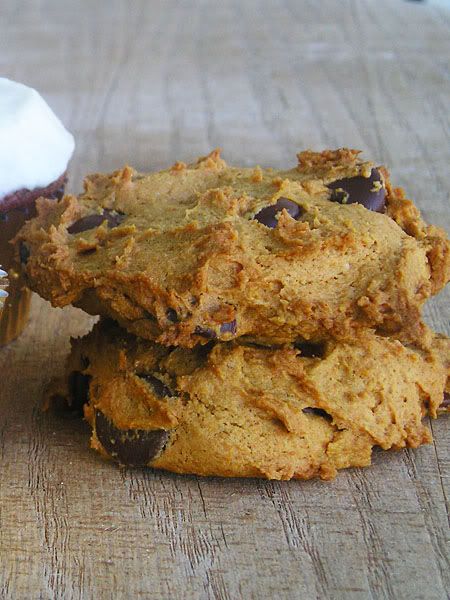
So here is the first pumpkin recipe I will share with you: Pumpkin Chocolate Chip Cookies. This was a time consuming recipe because I tried to drain the pumpkin puree of as much water as I could. See, in researching pumpkin cookie recipes I found that many complaints were that the cookie wasn't firm like a regular old chocolate chip cookie. One suggestion I came across was to squeeze the water out of the pumpkin puree so the batter/dough wasn't so moist. So I went ahead and did just that!

Notes
  1. As I mentioned, I drained as much water as I could from the pumpkin puree. I laid a paper towel on a plate, smeared all 15 ounces of pumpkin on that and then pressed another paper towel on the puree to soak up water. Once I had soaked as much as I could I would flip the "pumpkin pancake" onto another paper towel and start again. Every once in a while (especially after a lot of water had been removed) I would mix the pumpkin up to redistribute the moisture and soak some more out. I did end up with bone dry pumpkin but it was definitely much more solid and less moist when I was through.
  2. These cookies don't spread, rise, or change shape at all while cooking. Shape them how you want them before you pop them in the oven because every ridge and spike will still be there when they come out!
  3. Instead of using the suggested amounts of cinnamon, nutmeg, clove and ginger I used an equal mixture of pumpkin pie spice, cinnamon, nutmeg, and ginger.
The Verdict

Mr. C thought they were pretty yummy. I thought they were good as well - surprisingly I liked them best once they had cooled. Mr. C brought the leftovers to work with him and I believe there was only one left when he brought the tray back home. And finally, the people who received them in my pumpkin-treat-gift-box liked them, but I believe they enjoyed the muffins and cupcakes more. They did still end up muffin-y, but I think the drying-out process did help make them a little heavier than they otherwise would have been.

I found the recipe at YumSugar:

Ingredients

  • 2 1/2 cups flour
  • 1 tsp salt
  • 1 tsp baking soda
  • 1 tsp cinnamon
  • 1/2 tsp nutmeg
  • 1/2 tsp clove
  • pinch of ground ginger
  • 1/2 cup (1 stick) butter, room temperature
  • 1 cup brown sugar
  • 1/2 cup sugar
  • 1 egg, room temperature
  • 15 oz can of pure pumpkin
  • 1 tsp vanilla extract
  • 1-2 cups chocolate chips (I used dark chocolate - yum!)
Makes about 26 or so cookies.

Directions
  1. Preheat oven to 375 F.

  2. Sift together (or whisk in small bowl) flour, salt, baking soda, cinnamon, nutmeg, clove and ginger together and set aside.

  3. Beat butter, brown sugar and sugar together in a large mixer bowl. Add the pumpkin and vanilla and mix until incorporated. Then add the egg and beat well until fully incorporated.

  4. Gradually (I do it in 3 batches) beat the flour mixture into the wet mixture. Stir in chocolate chips.

  5. Drop rounded spoonfuls onto baking sheets lined with parchment paper and bake for 13-15 minutes until edges start to brown. Remove from oven and let sit on hot baking sheet for 2 more minutes.

  6. Move cookies to wire rack to cool completely.


And I have an extra something I need to tack onto the end here... My friends Dela and Adam know how much I like the movie The Matrix so they sent me a spoof video called The Matrix Runs on Windows. It cracked me up so I have to share it:


Monday, November 10, 2008

Pumpkin Treats


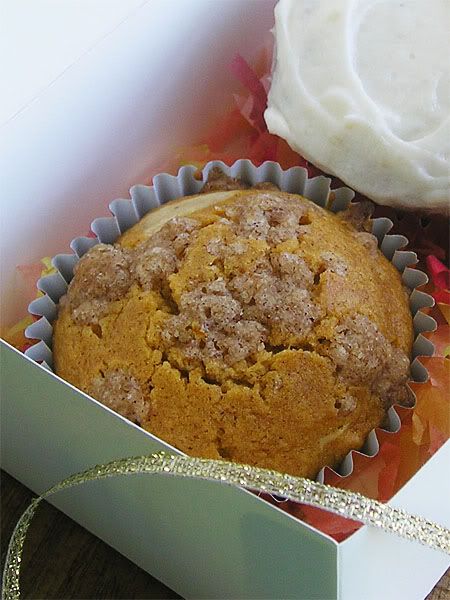
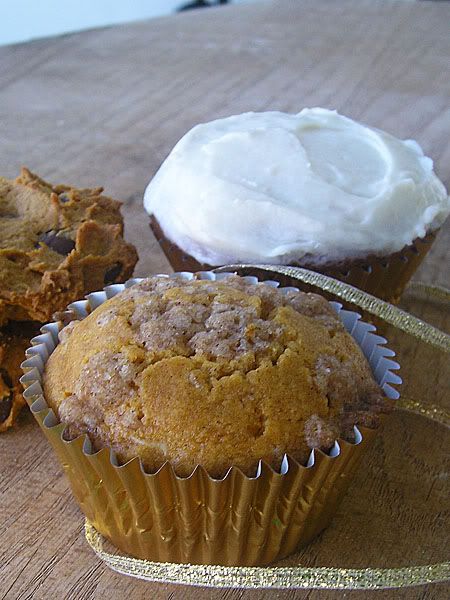
I have a confession to make - I have a thing for pumpkin. When October rolls around I get a hankering to make all sort so of pumpkin-y treats for myself. Things such as pumpkin pancakes, pumpkin bourbon cheesecake, pumpkin muffins, pumpkin cupcakes, pumpkin cookies, etc. So this year I decided to spread the pumpkin love and make some of these goodies for family and friends! I went with my favorite pumpkin cream cheese muffins with a side of pumpkin cupcakes and pumpkin chocolate chip cookies.

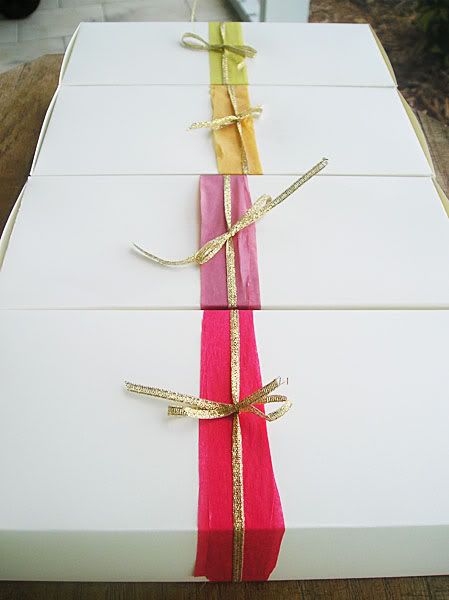
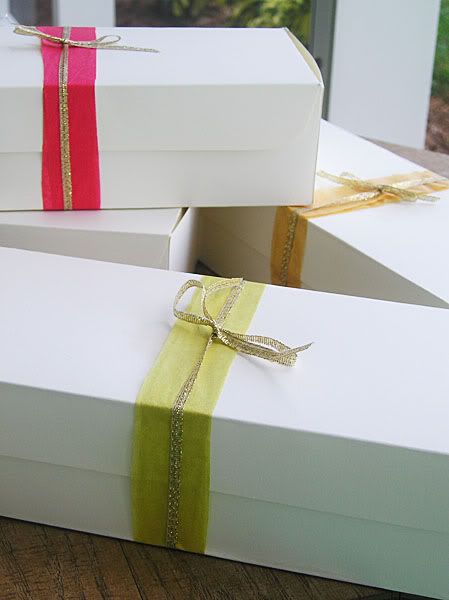
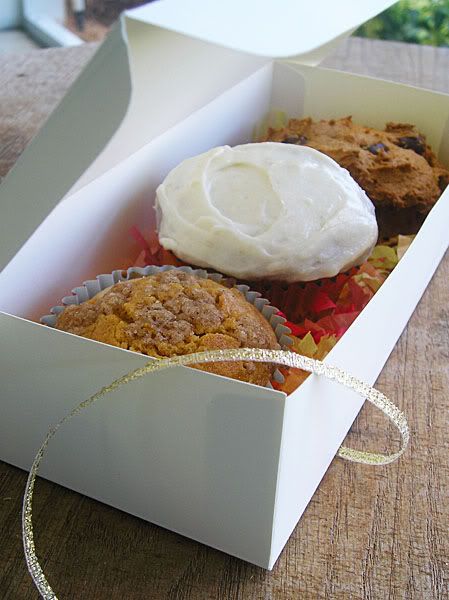
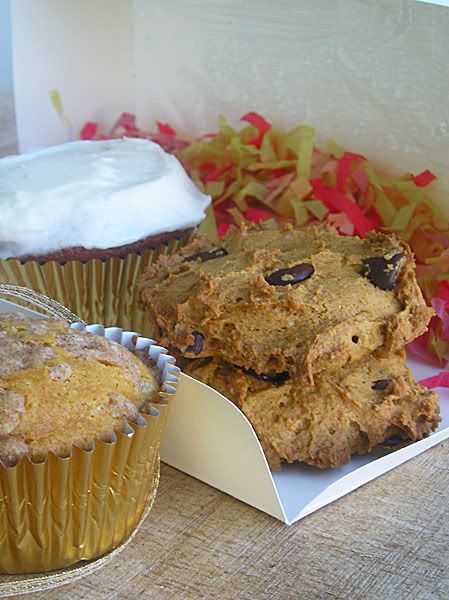
Not only did I bake the goods, but I also made the boxes! I can be so clever when I put mind to it! Eh, ok, so it's not *that* clever, but I was proud. I even cut up bits of fall-colored tissue paper as a fun colorful filler for inside the boxes. And unfortunately my boxes were just a tad too short for the cupcakes (even after I had cut their tippy-tops off) and by the time I gave them away the oils in the icing had made a little damp spot on the top of the box. Even the tissue paper band and ribbon didn't quite cover it up. Ooops!

Let me tell you, I spent all day making these things. Morning to evening! My feet were killing me by the end of the day. I ended up with quite a bit more than I was gift-boxing so Mr. C took the numerous leftovers (after I'd had a day to devour a few) to work where it seems they were a big hit. Always nice to know you're appreciated!

I will be posting these recipes in the future as well. Let me tell you though, my secret favorite was the pumpkin muffin... They're so delicious! The cupcakes were my second favorite with the cookie taking third place. Pumpkin cookies are a little bit hard to pull off I found. You can't really get a traditional chocolate chip cookie consistency - they tend to come out sort of muffin-y instead. They were still good though. Hope everyone enjoyed their pumpkin treats!