Thursday, July 24, 2008

Creme Brulee


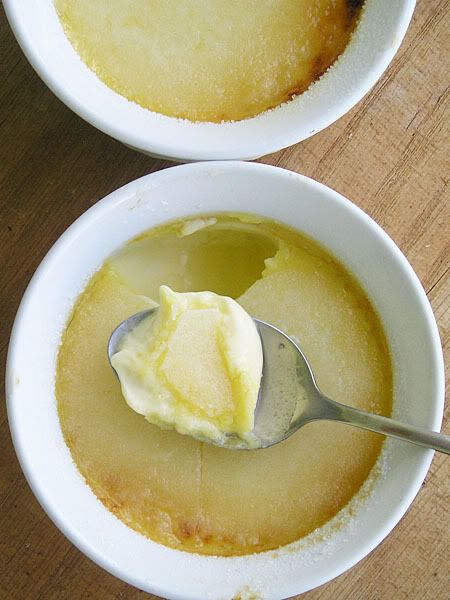
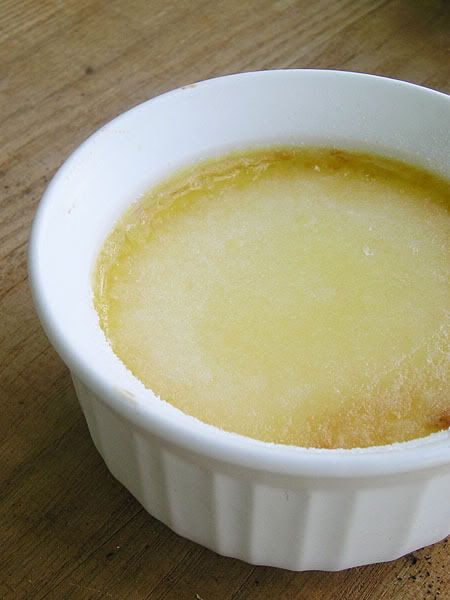
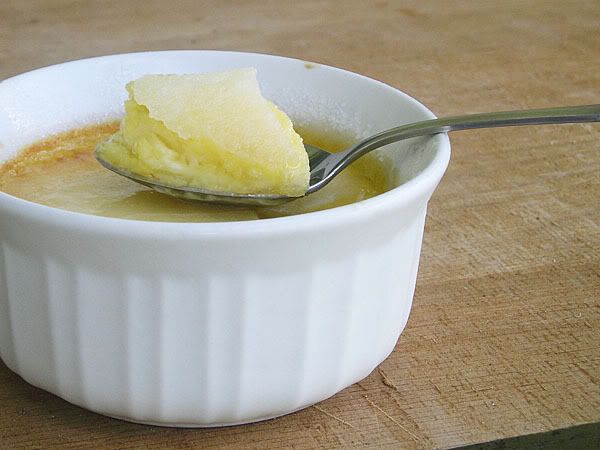
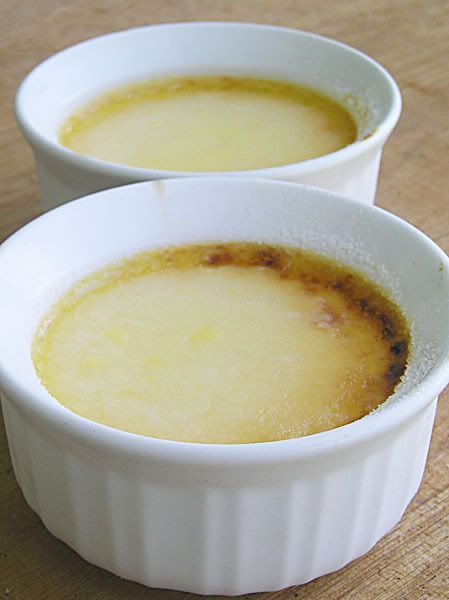
Yes, delicious creme brulee. And see that lovely little ramekin that it's in? That was bought for me (along with three others) by the wonderful Mr. C for my Birthday! Yes, I recently had a birthday. The big two six. It was a very good birthday though, despite the fact that I am, once again, one year older. Nah, getting older has it's perks too I'm sure. I mean, once you hit 65 it's like you're a student again - cheap(er) movie tickets, all right!

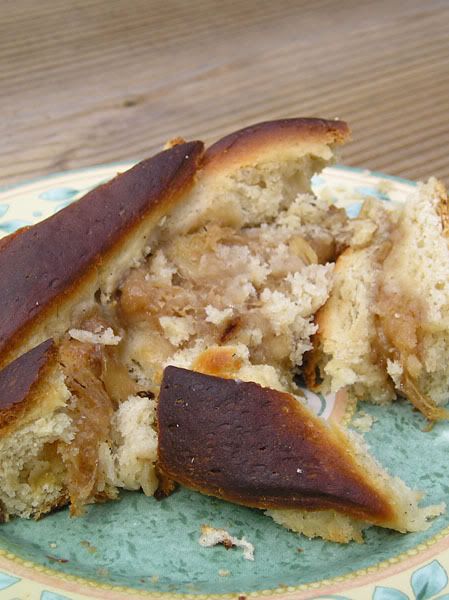
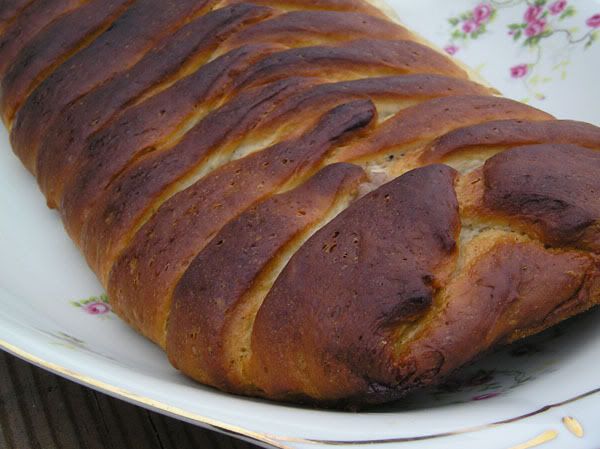
So for the Birthday celebrations my Mom cooked up a delicious curry for the family and friends that came over. She did a great job, especially with the toppings which included: shredded coconut, peanuts, mango, kiwi, homemade ginger-glazed walnuts, homemade candied ginger, and possibly some other yummy items I can't currently recall. And yes, when I say "homemade" I do mean that my Mom made them herself (she uses the left over syrup from the candied ginger to glaze the walnuts - how clever is that). So I guess what I'm driving at here is that dinner was indeed delicious.

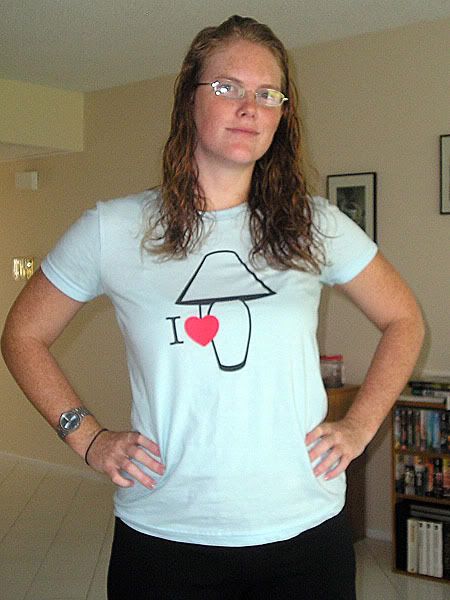
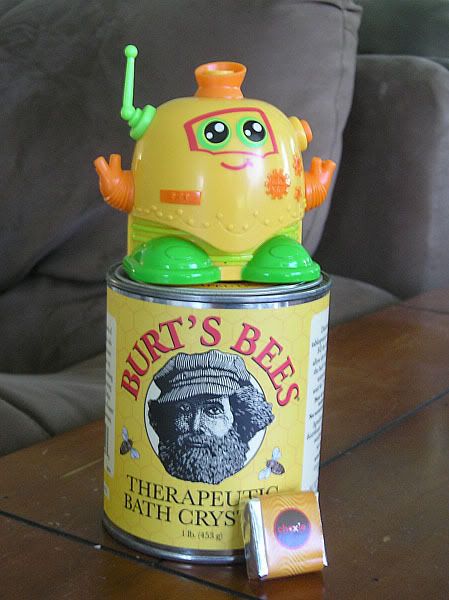
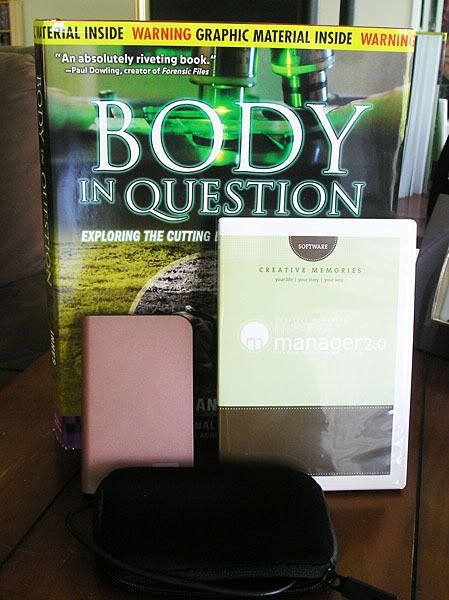
Lots of sitting around talking and laughing, a bit of frantic gecko catching (we didn't end up successfully catching him though), some present opening. I was actually really surprised that I got any presents! I really wasn't expecting anything, so I felt all warm and fuzzy when I got stuff. I even took pictures! I especially love that one t-shirt with the little cloud - he's "passing lighting." Get it?? And then he's all embarrassed in the last frame. So cute. And the "I *heart* lamp" shirt has significance to me personally. Lamps are very important to me. And for anyone interested I will will discreetly post my WistList here... Very discreetly...


And I have to mention the dessert - Pavlova. No birthday is truly complete without a Pavlova. And Mom makes the best Pavolva you have ever tasted. I don't think I've ever met a person that hasn't thought it was delicious. Even the picky eater at the party liked it enough that he wanted to bring home a slice. It was topped with whipped cream (real whipped cream, not that spray-can crap), strawberries, kiwi, and home grown passion fruit. Man it was good! So thank you to Mom for yet another incredible Pavlova! I should post that recipe one day actually...

Ok, it's finally creme brulee time. Since I got those little ramekins I had to try and make something. Mr. C and I watch Hell's Kitchen and they frequently have this as a dessert so I decided to give it a shot. Easy enough to make. Since it used only egg yolks I saved the whites and made myself a corn-and-cheese omelet the next day, hehe. I've put my thoughts about this dessert in the verdict section.

Notes
  1. When adding the final hard-sugar topping I think I added too much sugar. When I put it under the broiler (even though the ramekins said "no broilers allowed") to melt the sugar it made a really thick topping. You had to bang it pretty good with the spoon to get through to the creme part.
The Verdict

It was good but over all I just wasn't too excited about the end result. I've never had creme brulee before though, so maybe I'm just not a big creme brulee fan. It was very creamy and smooth, which I'm assuming is a good thing, but for me it was just too smooth. I also think I would add a bit more sugar if I made it again. O, and the lack of a little blow torch to brown the sugar was a bit disappointing.


And here's the super-simple recipe from About: Gourmet Food (I used half this recipe because 8 creme brulees is a lot):


Ingredients
  • 4 cups heavy cream
  • 8 egg yolks
  • 1/2 cup sugar, plus extra for sprinkling
  • 1 Tbsp vanilla extract
Makes 8 servings.

Directions
  1. Preheat oven to 300° F. In a saucepan over medium heat, combine cream and 1/2 cup sugar. Cook while stirring until cream just begins to bubble (about 4-5 minutes).

  2. In a bowl, beat egg yolks and vanilla until well blended. Yolks will become a light yellow. Gradually pour hot cream into yolks, stirring constantly. If the mixture looks a bit grainy, strain mixture through a sieve set over a bowl.

  3. Pour the custard into 8 6-oz ramekins (custard cups). Place ramekins in a baking dish and add hot water to fill pan halfway up the side of the ramekins.

  4. Bake until set, about 40-45 minutes, until custard is mostly firm but the centers of the custards shake gently when tapped. Remove from the oven and allow the ramekins to cool slightly.

  5. Remove the ramekins from the pan and refrigerate overnight. Just before serving, sprinkle the custards with 2 teaspoons sugar and caramelize the topping by placing under broiler until sugar is a golden brown (about 3 minutes). Watch carefully to not burn the sugar. Alternatively, use a handheld propane or butane torch to caramelize the sugar.

  6. Optional: Top finished custards with fresh berries, mango or peach slices, or other fresh fruit.


Tuesday, July 22, 2008

Peach Lattice Cake


I'm back already! Thought I'd treat everyone to two posts today in an attempt to make up for my negligence. But first I need to turn down the A/C... ... ...There, much better! Ok!

Now this creation was completed a while ago as well - remember how in my earlier post I said I've been lazy? That includes cooking laziness too. But when it was made it was a large thing - almost 1 1/2 feet long! I couldn't (or perhaps I should say "shouldn't") eat that whole thing by myself, so I brought it over to my Mom's house to share with the family.

Although the original recipe I used called for an apple filling I decided to wander off the beaten path and try a white peach filling. So I bought my peaches and coldly told Mr. C with a wag of my finger "Now don't go eating none of those peaches, hear??" until I was ready to get down to business. I was very happy with my dough consistency - it was very delicate and dainty (yes, I do realize that's an odd way to describe dough). And although I think I over-cooked the peach filling it still came out tasting delicious. It wasn't until afterwards that I thought perhaps peaches didn't need as much softening up as apples.

And last of all, I was sad that it came out looking burnt. But I was happy that it didn't taste burnt. I guess you can't win every time, huh? It was also a kind of difficult dish for me to photograph. It might have been prettier if I'd had some ice cream or fruit slices or the glaze that was supposed to go on top but I didn't make. Oh well, good enough!

Notes
  1. I decided to use peaches instead of apples. I didn't change anything except the apples - everything else stayed the same. The only thing I might do different if I made this again would be to not cook the peaches so long. The only problem there is that it took a long time for the sauce to get thick enough to make a nice filling. I have a feeling I might have had very juicy peaches though.
  2. My dough was fairly sticky. I didn't want to add too much extra flour because I wanted a nice tender dough, so when I did the kneeding I used the rubber spatula in one hand to help lift the dough and used the other hand to quickly push the dough into itself. Still kinda messy, but better than it would have been had I stuck both hands in there.
The Verdict

I thought it came out really good! And my Mom, sister, and friend all said they liked it. I do think it could have used more filling. I would make this again though - would love to try other fillings too.


Here is the recipe from Technicolor Kitchen:


Ingredients

Dough:
  • 2 Tbsp warm water (105ºF to 115ºF)
  • 1 package (2 1/4 teaspoons) active dry yeast

  • 1/2 cup whole milk
  • 6 Tbsp sugar
  • 5 Tbsp unsalted butter, diced, room temperature
  • 1 tsp salt
  • 2 large egg yolks
  • 1 tsp finely grated orange zest
  • 1/2 tsp ground cardamom
  • 1/4 tsp ground nutmeg
  • 2 to 2 1/4 cups all purpose flour
Filling:
  • 2 Tbsp unsalted butter
  • 6 Tbsp (packed) golden brown sugar
  • 1 1/4 pounds Golden Delicious apples (about 3 medium), peeled, cored, quartered, cut crosswise into 1/4 inch slices (I used white peaches instead)
  • 1 tsp finely grated orange zest
  • 1 tsp finely grated lemon zest
  • 1/2 tsp ground cinnamon
  • 1/8 tsp ground cardamom
  • 1/8 tsp ground nutmeg

  • Nonstick vegetable oil spray or vegetable oil
  • 1/3 cup vanilla wafers
Glaze: (I didn't make this or any glaze)
  • 1 1/2 cups powdered sugar
  • 2 Tbsp (or more) orange juice
Makes 8-10 servings.

Directions
  1. Dough: Place 2 tablespoons warm water in small cup. Mix in yeast. Let stand until yeast dissolves, about 6 minutes.

  2. Stir milk, sugar, butter, and salt in medium saucepan over medium-low heat just until sugar dissolves and butter melts (mixture should be just warm). Scrape milk mixture into large bowl; cool to lukewarm if necessary. Whisk in yeast mixture, egg yolks, orange peel, and spices. Add 2 cups flour; mix with rubber spatula until dough comes together. Turn dough out onto floured work surface. Knead until smooth and silky, sprinkling with more flour by tablespoonfuls as needed, about 6 minutes – it’s a very tender dough, delicious to work with. Place in clean large bowl. Cover with plastic wrap and kitchen towel. Place in warm draft-free area (I use my microwave oven); let rise until light and almost doubled in volume, about 2 1/2 hours.

  3. Filling: Melt butter in heavy medium skillet over medium-high heat. Add brown sugar. Cook until thick grainy sauce forms, about 1 minute. Mix in apples (or peaches). Cook until apples are tender and sauce is reduced to glaze, tossing often, about 7 minutes. Mix in all grated peels and spices. Cool filling at least 30 minutes and up to 3 hours.

  4. Place large sheet of foil on work surface; spray with nonstick spray. Turn dough out onto foil. Roll out to 14x12-inch (35x30cm) rectangle. Sprinkle cookie crumbs in 4-inch-wide (10cm) strip down center, leaving a 1/2-inch border at top and bottom. Arrange apples with any juices atop crumbs. Starting 1/2 inch from each long side of apples, cut straight to edge of dough at 1-inch intervals, making about 13 strips on each side. Fold dough strips alternately and on slight angle over filling, forming lattice. Seal open ends of dough.

  5. Slide foil with dough onto large rimmed baking sheet; trim foil overhang. Cover cake loosely with plastic and towel. Place cake in warm draft-free area; let dough rise until light and puffy, about 1 3/4 hours.

  6. Preheat oven to 375ºF. Bake cake uncovered until golden brown, 30 to 35 minutes. Cool 30 minutes.

  7. Glaze: Mix powdered sugar and 2 tablespoons orange juice in small bowl to blend, adding more juice by 1/2 teaspoonful if too thick. Drizzle glaze over cake. Gently run spatula under cake to loosen from foil. Cut crosswise into slices. Serve slightly warm or at room temperature.


Rainbow Cupakes


Oh my, it has been a little while since my last post! I've been too busy being lazy, and right now I find myself watching my very own copy of The Chronicles of Narnia: The Lion, the Witch and the Wardrobe (I love that movie). And Prince Caspian was really good as well! I can't wait for the rest of the movies to come out! But enough about the movies, let's move on to the subject of this post.

Rainbow cupcakes! These aren't a recent creation though - I made them a few months ago. I got the idea from the Craftster Dessert Forum (Craftster is an awesome site by the way). People were posting all sorts of delicious looking rainbow desserts: cheesecake, cake, cupcakes, sweet popcorn, etc. So I decided to have a go at it myself and I must say, I think they turned out pretty cool. They also tasted good which was an added bonus.

If you're thinking that making rainbow cupcakes sounds difficult have no fear. It's as simple as...cupcakes really. All you need is food coloring and a few extra bowls. I used a fairly thick-battered recipe which I think helped keep the colors separated, but I'm sure any light colored batter would work. Once you have your batter all made up, split it evenly between a few bowls (one bowl for each color) and add food coloring to each.

For my cupcakes I dolloped a tablespoon of each color (I had four colors total) into each cupcake liner and baked them up. I have seen layered cakes (layers of color instead of blobs) as well - I assume their batter was thinner than mine. I just frosted mine with a basic vanilla buttercream frosting and called them done. They were delicious! I'll put down the recipe I used, but as I mentioned any light cake batter should work.

Notes
  1. It's pretty straight forward, no tricks.
The Verdict

Very delicious, especially when freshly frosted. After a few days of sitting around they get tough though.


I found the recipe at the wonderful Coconut & Lime blog (the recipe makes enough batter for an entire cake, so you may want to halve it if you only want a few cupcakes):

Ingredients
  • 3 1/3 cup flour
  • 1 1/3 cup milk
  • 1 1/4 cup sugar
  • 1 cup butter
  • 1/4 cup light brown sugar
  • 1 1/2 Tbsp baking powder
  • 3 Tbsp vanilla paste (I used 1 1/2 Tbsp vanilla extract)
  • 1/2 tsp salt
  • 3 eggs
  • 2 egg yolks
Makes an entire cake.

Directions
  1. Preheat oven to 350. Grease and flour or spray with baking spray two 8 inch round pans.

  2. In a large bowl, beat together butter and sugars until fluffy. Add eggs and egg yolks, mix until well combined. In a medium bowl, whisk together flour, salt and baking powder. Add the vanilla paste to the milk. Mixing continuously, add the flour and milk alternately, beginning and ending with flour.

  3. Divide evenly into the prepared pans and bake about 40 minutes or until the top is golden and a toothpick inserted in the center comes out mostly clean. Cool on wire rack, removing from the pans after about 5 minutes. Cool completely then ice.

And my icing recipe came from Cupcake Project (once again, I substituted the vanilla paste with half the amount of vanilla extract). Yum!


Saturday, July 5, 2008

Antique Lavender

Another pair of earrings! My beading "specialty" tends to be earrings so that's what you'll see most of when I get down to business. I started out the day attempting to make a necklace, but some how I turned to earrings... But I'm quite happy with them! They turned out similarly to those wire-wrapped earrings I was referring to in an earlier post. They aren't nearly as extravagant and beautiful, but it's a start!

They aren't made from any special supplies - just silver colored wire that's been sitting around long enough to tarnish a bit. The pearls aren't anything special either. The larger beads are some sort of semi-precious stone, but I just don't remember which one! I'm terrible with gem-stone identification... They're just a tad heavy, but I managed to go a good 5 hours before my ears started complaining. That's the only drawback to big beautiful earrings. They're usually on the heavy side. But I like mine!


Thursday, July 3, 2008

French Bread


I've never made bread before, so this was interesting. And fun! Don't let me forget to mention that it was fun too. I felt like a real cook with all the little things I had to set-up such as wrapping my bowl in towels for the risings, making a contraption out of a floured pillow case and wine bottles to get that french-bread-shape, and filling hot pans with ice in an attempt to make steam. I had to be creative and use my noggin to figure out how to do some of the things the directions called for! They were very good directions though and helped me figure out how to do most of the steps.

I've never baked anything that has had to rise for as long as or as many times as this bread. Three risings - one of which was about 4 hours long - made me feel like I might actually know what I was doing. I have to admit though, I think I managed to get a nice consistency with my dough which is something I tend to struggle with. In the end though, it just didn't come out quite as I imagine french bread should. I don't know if it was old yeast, lack of adequate steam and cooking surface, or just my lack of skills but the loaves didn't seem to rise much in the last rising and they came out of the oven rather flat and dense. Ok ok, so I did drop one loaf on the floor while transfering it to the baking pan, but still!

Notes
  1. I followed the very very detailed directions as closely as I could and everything worked out well enough for me. They've covered just about any question you could have in the recipe.
The Verdict

Although my attempt didn't end up quite as nicely as I had hoped, I thought it was pretty good! It was best fresh from the oven, but I did take a loaf to my Mom's and we heated it in the oven and dipped it in olive oil with salt, pepper, and parmesan. That was my favorite way to eat it. And although everyone agreed that it was somewhat tough, we finished the whole loaf during that meal. So I would say it was just alright, but would definitely be better if I had more experience with the whole bread making process.

I'm not going to post the recipe here because it is a very long and concise recipe. You're much better off visiting the original site! That being said, here is the recipe from The Sour Dough.


Wednesday, July 2, 2008

Danger: Spiders!!

I thought I would do a little show-and-tell. Like so many other people, I too randomly take photos of things that I like and are interested in, no matter how freaky they may be to someone else. So today I will be presenting some scary spiders! As well as some pretty flowers and yummy treats. Maybe I should start with those.

Mr. C recently went to the Czech Republic on business. It was his first time going to Europe so he was excited (in a calm, guy-like way) and I've never been to Europe so I was jealous (in a happy, kind, and encouraging way). I insisted that he bring back some of their sweets (because it's a well known fact that candy is a solid indicator of how lovely a country is). He didn't have much time to himself on the trip so he managed to bring back only a few things.


The Tatranky was very good. It's basically just a crispy wafer bar, nothing too exotic. Mine had a hazelnut flavor (yum!). I haven't really had anything like the Milka Yoghurt bar though. It was really delicious!! The taste of yogurt wrapped up in sweetness and creamy chocolate was great. I'd like to get my hands on some more of those. And if you are interested, there seems to be a decent bit of information on their Purple Cow logo... Who'd'a thunk.

Now this Jamaican Caper flower can be found in my mother's backyard. Isn't it a pretty little thing?? It's a plant native to Florida (which is where I live) so it fits perfectly with the rest of her native-plant landscape. Since "going native" my Mother's backyard has become home to an unbelievable number of butterflies! Walking out back you're usually able to spot at least four fluttering around, and where there's four there's usually more.


Continuing on with the wildlife theme, here are some pretty Green Igunanas that were sunbathing outside our condo. Just hanging around, eating grass I suppose. I do believe the brighter green one is younger (although I think they're both pretty young). I tried to be stealthy in getting my photos, but they are paranoid little buggers! They ran as soon as I cracked open my patio screen door. Ah well, I'm glad to know they're afraid of humans - probably better that way.


And now for some creepy crawly nature. Not only does my Mom's garden attract butterflies, it also attracts spiders!! ::evil laughter:: I've seen two really impressive spider-happenings in that backyard. The first was a miracle of life - the hatching of a bunch of baby spiders! It kind of made my skin crawl to look at it, but at the same time how cool is it to see a whole nest of tiny little spiders?? Tiny little Charlotte's running off to start their own little lives. I just had to get pictures. If I can assume that the adult spider hanging out in the web with them was their Mommy, then I think they were Orchard Spiders. I did a lot of googling and am pretty confident that they're Orchard Spiders.


The next spider experience was just the opposite: the miracle of death! This spider (after much googling) appears to be a Silver Argiope. She (I think it was a she for some reason) was busily wrapping up her prize to ripen for another meal. And the truly disturbing part was that if you looked closely you could see the silken package wiggling around as though whatever was in it was desperately trying to get free (as I'm sure it was). Eeeps! But that's how life works I guess. I've never actually seen a spider in action. I could see the tiny strand of silk being pulled out of her spinnerets as she worked.


Nearby was another Silver Argiope just hanging out in her web. If you're an observant student (or if you have eyeballs to see with) you may have noticed that their webs have extra...web on them. The Silver Argiope is part of a group of spiders called Orb Weavers. They do interesting things with their webs and no one really knows why. But there are some ideas! Ideas are fun.

So the extra web-stuff is called a stabilimentum. Older spiders will build the "X" shaped stabilimentum, while younger ones tend to make that circle shape. The possible explanations are: extra support for the web; to attract prey; to make it visible to birds so they don't fly into the web and destroy it. There are a few more, but those are my favorites. I think it's all pretty interesting!

I had fun taking these pictures and seeing the different wildlife in my neck of the woods. It's neat to know what's out there. Oh, and in case anyone was curious, neither of the spiders are poisonous, so no worries there. Hope no one has nightmares!!!