
Okay, now that all the shat has hit the fan I feel comfortable enough in sharing mine and Chuck's big plans. We are taking a trip around the world! Woohoo! No, really, we are. Yes, around the whole world. Well, minus Antarctica for now. At least that's the plan. And of course, when the money runs out we go running home. But until then the plan is to travel through Europe, some of Africa, definitely Asia, Australia of course, and if we're lucky we'll make it to South America. And hopefully my sister Robyn will be able to join us at some point along our trip (she has some other obligations she needs to attend to before abandoning the real world to go on walkabout).
We have saved for a while, not knowing what exactly we were saving for. Sometime last year the travel bug bit us. Then at the very beginning of this year we realized that now is as good a time as any to drop everything and travel. I mean, we have no kids, no house, just bit of furniture, no real obligations beyond a couple student loans. So why not now??
We have our tickets to London for April 1st. Right now we're moving out of our nice condo (which will be missed) and staying at my Mom's house for the next month. It's stressful preparing for such a big adventure. And that doesn't include preparing an itinerary! We have no plans - we'll just go where the wind blows us. If we feel like up and going to Milan one day, then we'll do it. If we feel like staying for three weeks in Osaka, then we'll stay. Sounds so nice...
Needless to say we are excited! And nervous. We're hoping to be able to share our journey with the rest of the world (ie: family and friends) by keeping a little blog. Who knows how often we'll manage to update, or how often we'll feel like updating, but we'll do what we can. That's it for now! I'l be back again as we get closer to leaving time!
Wednesday, February 25, 2009


Monday, February 2, 2009
Exciting News!
I have exciting news to share with the world!! I'm not going to share just yet, as some things need to be taken care of before the whole world knows. And by whole world I mean my tiny, uncharted, undiscovered corner of the internet that I have here.
So stay tuned for more details in about two weeks. And no, I'm not pregnant...
So stay tuned for more details in about two weeks. And no, I'm not pregnant...
Thursday, January 8, 2009
Bronze Spirals
These earring were time-consuming to make. As you can see, I spiral-wrapped the entire frame of the earrings... I'd never done any wrapping quite as thoroughly as this pair so it was new territory for me. I would fix or change things the next time I made a pair in this way, but I really love these earrings (I usually am fond of a first-time creation). The colors are so Autumny and rich. And if you admire them from a distance you can't see all the flaws! So don't get too close, k?


Saturday, January 3, 2009
Icicles
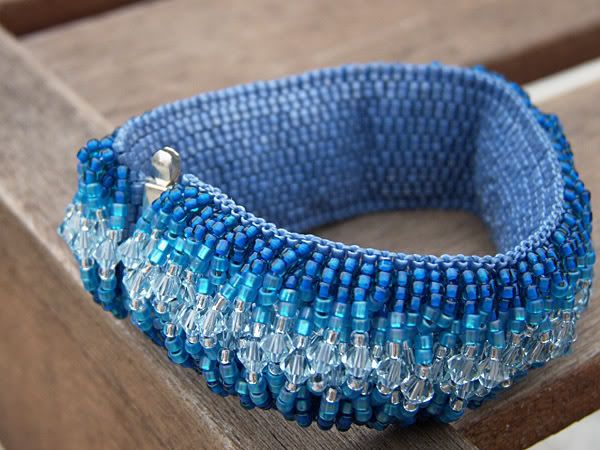
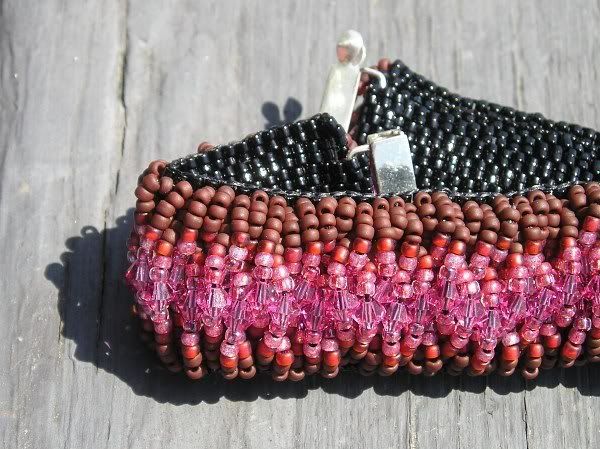 I made my sister this icy bracelet for her Birthday this year. It is a blue version of my Pink Caterpillar bracelet I made a few years ago. It's a very thick piece with a ton of Swarovski crystals woven in - very weighty. I don't find much occasion to wear my own pink one, but my sister is much more stylish than me and knows how to make it look good. Since she mentioned that she liked it (well, ok, she outright said "You could make me one of these in green or blue" as she help up the original) I decided to make her the Icicles. I had a helluva time picking out the right color combo as I did all my shopping online, but I think it turned out to be a pretty good blend in the end! I was going for the icy look and I think I achieved it. And most importantly, she seemed to like it!
Oh, and to be fair I have to mention that I found the pattern/instructions for this piece in the April 2006, Issue 72 Bead & Button magazine. Unfortunately I'm not so talented as to be able to spontaneously come up with amazing bead-weaving patterns.


Tuesday, December 30, 2008
Sugar Cookies
 So for the lovely month of December I did as I have done for the past two years and had myself a Cookie Decorating Party. Well, it wasn't quite a party - more like a small gathering I suppose. But that's beside the point! I had friends over and forced them into slave labor not only by making them bake and decorate cookies, but also by making them decorate my tree!! They liked it though, I'm sure. So for the lovely month of December I did as I have done for the past two years and had myself a Cookie Decorating Party. Well, it wasn't quite a party - more like a small gathering I suppose. But that's beside the point! I had friends over and forced them into slave labor not only by making them bake and decorate cookies, but also by making them decorate my tree!! They liked it though, I'm sure. But really, this time of year is the time to get together with friends and family and I was really grateful to have my friends close by me this year. The past three years I had been in California, where I developed what I'm now calling my Cookie Decoration Tradition with Mr. C. I am very happy to be able to share it with some more of the very special people in my life! |
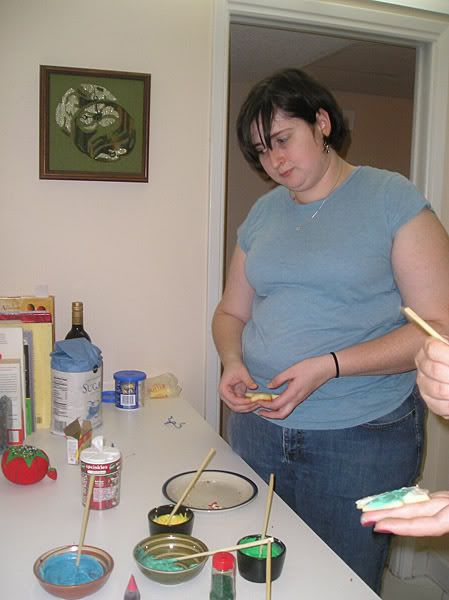 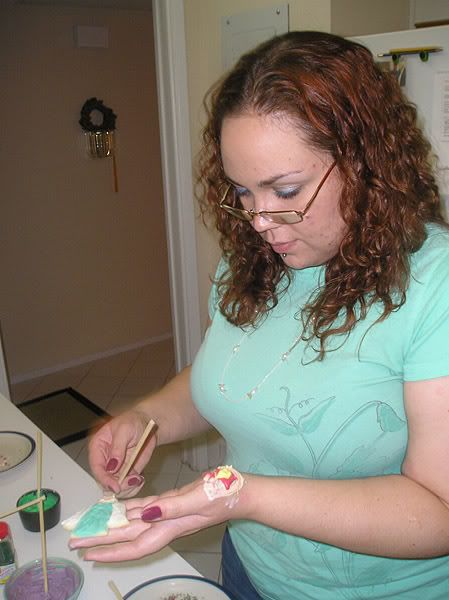 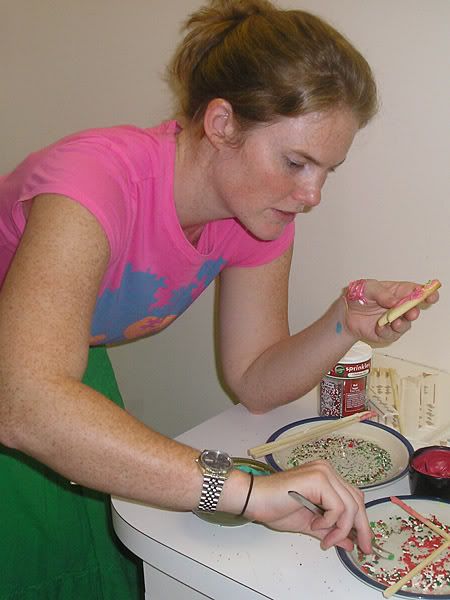  So yes, Dela, Jessica and I slaved away in the kitchen stirring up the dough, rolling it out, cutting little cookie shapes. Then after they were baked and cooled the truly challenging part came. One never does realize how few creative ideas one has until they are confronted with 30 or so cookies to decorate. Let me tell you, it's daunting. I usually start off with a couple of bland creations as I warm up to the task. Then I pop out a few really snazzy, dazzling cookies and am suddenly left drained of inspiration. That's when I just slather on some icing, toss a few sprinkles and call it done. They all look great lined up on the tray no matter what though! By the way, pictured to the right are two of my more amusing creations: the top cookie is me, middle is Dela, and the bottom is Jess (she made that one). Anyways, the true purpose of this blog entry is to share with you the wonderful recipe for sugar cookies that I have successfully used thus far, so I'll move on to that part. So yes, Dela, Jessica and I slaved away in the kitchen stirring up the dough, rolling it out, cutting little cookie shapes. Then after they were baked and cooled the truly challenging part came. One never does realize how few creative ideas one has until they are confronted with 30 or so cookies to decorate. Let me tell you, it's daunting. I usually start off with a couple of bland creations as I warm up to the task. Then I pop out a few really snazzy, dazzling cookies and am suddenly left drained of inspiration. That's when I just slather on some icing, toss a few sprinkles and call it done. They all look great lined up on the tray no matter what though! By the way, pictured to the right are two of my more amusing creations: the top cookie is me, middle is Dela, and the bottom is Jess (she made that one). Anyways, the true purpose of this blog entry is to share with you the wonderful recipe for sugar cookies that I have successfully used thus far, so I'll move on to that part.Notes
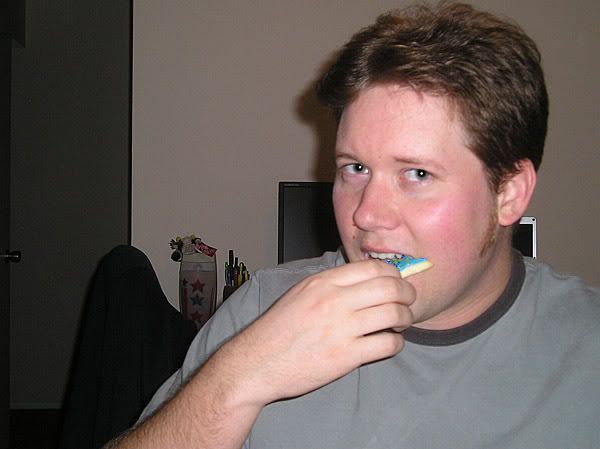 Of course they were good. I imagine it's hard to mess up sugar cookies, but I do particularly like the density and texture of these ones. They're weighty enough to hold their own with a nice thick frosting slathered on top. Mr. C liked them too, as you can see to the left. Of course they were good. I imagine it's hard to mess up sugar cookies, but I do particularly like the density and texture of these ones. They're weighty enough to hold their own with a nice thick frosting slathered on top. Mr. C liked them too, as you can see to the left. |
The recipe is from trusty old AllRecipes.com and submitted by Jill Saunders: Ingredients
Directions
|
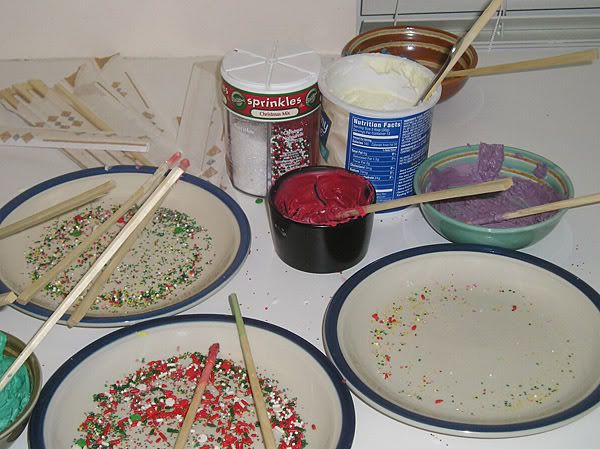 Frosting Tips: Let me share our frosting set-up. We made multiple colors of frosting by just mixing food coloring to our hearts desire with white frosting. If you need to soften your frosting a bit just stick it in the microwave for 5 seocnds (no more than 5 seconds at a time!). We used disposable chopsticks to spread the frosting as I decided butter knives would be far to unwieldy. And we put the cookies on plates when we used sprinkles so they wouldn't go all over my kitchen.
Friday, December 12, 2008
Days of Summer
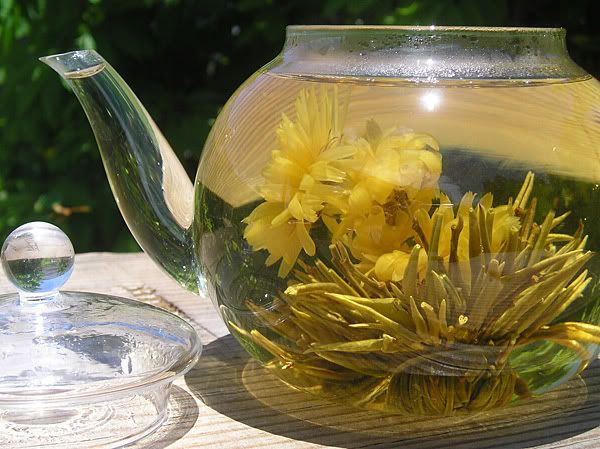
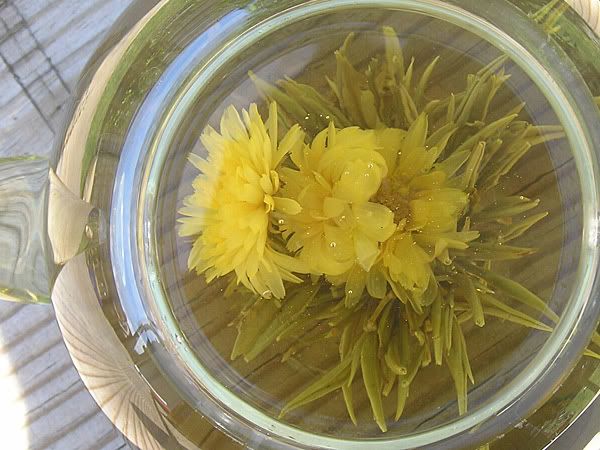
I thought I'd share some lovely pictures I took over the last summer (but have been too lazy to post until now). I love the Florida sunshine - it makes for some lovely and intense light. My favorite shots are of a blooming tea my Mom bought a while back. She got the nice clear teapot to go along with it because let's face it - what's the point of a flower in my tea if I can't see it?


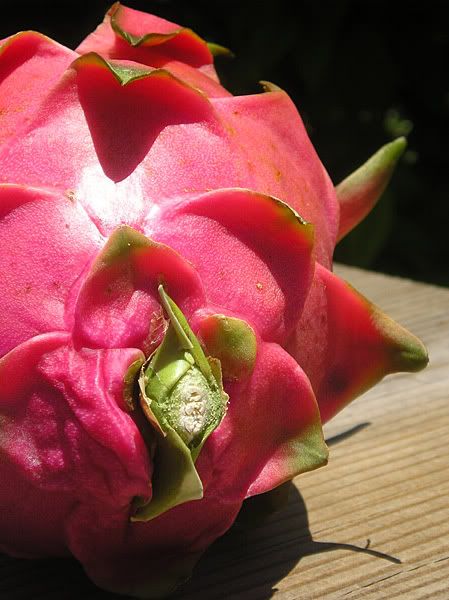
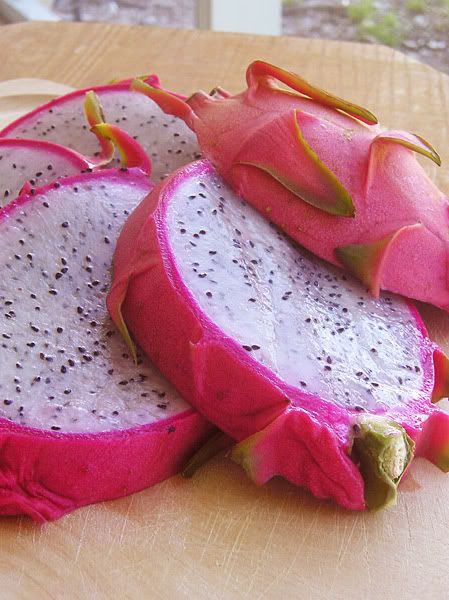
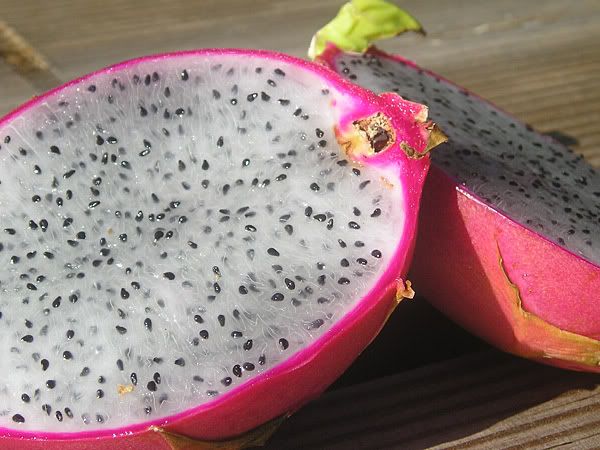
While out shopping we also ran across this lovely bright pink fruit at the Asian supermarket. Having just recently sen a recipe for Dragonfruit Sorbet I actually knew that the fruit was a Dragonfruit so we bought a couple. They're so vibrant on the outside that it's really a shock to cut it open and find a tuxedo colored black and white inside. You can eat it raw by just scooping it out with a spoon, or you can make sorbets (and other things I'm not aware of) with it. I tried making the sorbet with mine but it didn't end up so great. I blame that on a lack of an ice cream machine though... It couldn't have been my fault! No way. Nope. Not at all. Not me. Uhhuh...


Oh, and that last one is just a cute little flower in the yard that caught my eye. I've no idea what kind of flower it is.
And those are my days of summer! Finding different things to try, flowers that make tea, pretty things growing all around, sun beating down on you. And now it is the winter (which in Florida isn't so different from the summer, although this year has actually been nice and cool). I like my days of winter too though - decorated trees and cookies, presents, food, family. Well, that's that! I'm off to make myself some tea (not the blooming kind though).
While out shopping we also ran across this lovely bright pink fruit at the Asian supermarket. Having just recently sen a recipe for Dragonfruit Sorbet I actually knew that the fruit was a Dragonfruit so we bought a couple. They're so vibrant on the outside that it's really a shock to cut it open and find a tuxedo colored black and white inside. You can eat it raw by just scooping it out with a spoon, or you can make sorbets (and other things I'm not aware of) with it. I tried making the sorbet with mine but it didn't end up so great. I blame that on a lack of an ice cream machine though... It couldn't have been my fault! No way. Nope. Not at all. Not me. Uhhuh...
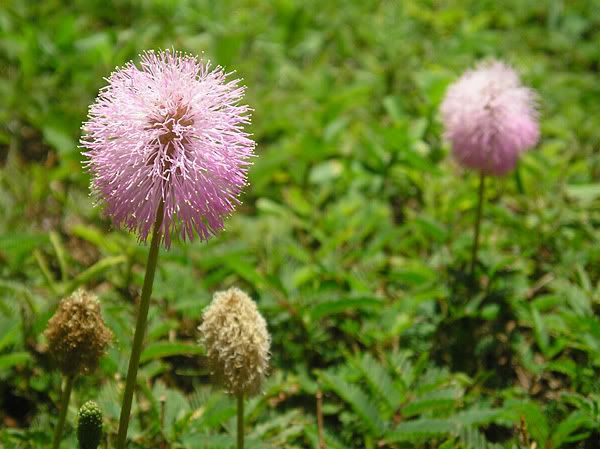
Oh, and that last one is just a cute little flower in the yard that caught my eye. I've no idea what kind of flower it is.
And those are my days of summer! Finding different things to try, flowers that make tea, pretty things growing all around, sun beating down on you. And now it is the winter (which in Florida isn't so different from the summer, although this year has actually been nice and cool). I like my days of winter too though - decorated trees and cookies, presents, food, family. Well, that's that! I'm off to make myself some tea (not the blooming kind though).
Monday, December 8, 2008
Tourmaline Cubicles
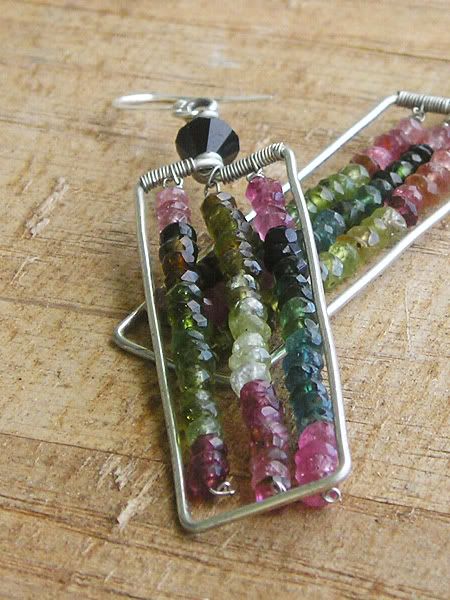
Alright, nice to see everyone again. I am back with a recently created pair of earrings. Rather simple, a little bit on the classy-business side. All together nothing too exciting but I figured I'd share anyways.
The rectangle was hand-shaped by your truly (if you looked closely you can see that it is indeed hand-shaped). The dangling stones are Tourmaline I think. I got the strand at a bead show in California quite a while ago and am just now getting around to using them so I can't exactly be sure, but Tourmaline sounds good to me. The downside to these earrings is that it doesn't take too much pressure to bend them out of shape so one has to be careful while handling or wearing them. But hey, I can always bend them back into shape I guess, so it's not so bad. Enjoy!


The rectangle was hand-shaped by your truly (if you looked closely you can see that it is indeed hand-shaped). The dangling stones are Tourmaline I think. I got the strand at a bead show in California quite a while ago and am just now getting around to using them so I can't exactly be sure, but Tourmaline sounds good to me. The downside to these earrings is that it doesn't take too much pressure to bend them out of shape so one has to be careful while handling or wearing them. But hey, I can always bend them back into shape I guess, so it's not so bad. Enjoy!


Thursday, November 13, 2008
Pumpkin Cream Cheese Muffins
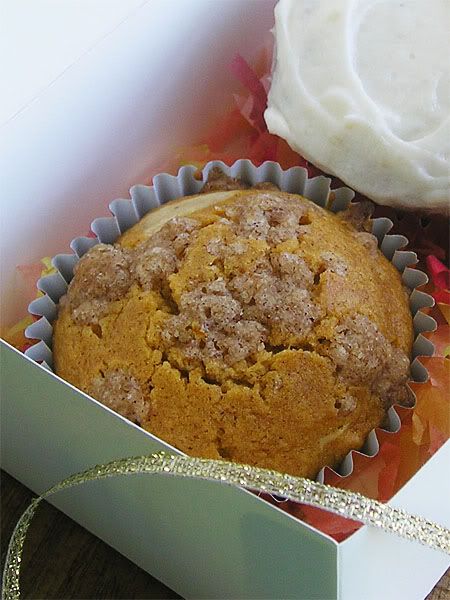
Here is the third and final recipe from my pumpkin-treats collection. This is the best of the three with it's complex combination of complementary flavors creating a combustion of creative climax! Woohoo, alliteration is useful for more than just high school english class! But yes, as I was saying, these muffins are delicious. And easy despite requiring numerous bowls.
Notes
- When filling the cupcake pan I take about a tablespoon of batter and kind of spread it on the bottom and sides of the cupcake liner, leaving an empty space to dollop in the cream cheese mixture. Then I fill it the rest of the way with the muffin batter and top with streusel.
- Alternately, I will also fill the liner 2/3 with muffin batter and do the best I can to make a little well in the middle and fill it with cream cheese mixture. This way you can see the cream cheese before you even bite into the muffin.
- If you prefer a lighter muffin feel free to replace the brown sugar in the muffin batter with white sugar. Alternately, replace the white sugar with brown for a heavier muffin.
Delicious delicious delicious. These were by far the hit. Mr. C's boss made a point of telling him how good they were; Mr. C, my Mom and my sister both liked them best; I think they were the best of the bunch. And if one is allowed to use compliments from previous years, they were well-received at the pumpkin carving party I made them for last year. These are killer muffins! The cream cheese mixture isn't too strong in flavor and isn't mushy or anything and the streusel adds a nice sweet crispiness to the top of the muffin.
The recipe is from trusty old AllRecipes.com and submitted by Barb:
Ingredients
- Filling
- 1 package cream cheese, 8 oz
- 1 egg
- 1 tsp vanilla extract
- 3 Tbsp brown sugar
- Streusel
- 3 1/2 Tbsp all-purpose flour
- 5 Tbsp brown sugar
- 3/4 tsp ground cinnamon
- 4 Tbsp butter
- Batter
- 2 1/2 cups all-purpose flour
- 1 cup white sugar
- 1 cup brown sugar
- 2 tsp baking powder
- 1 tsp ground cinnamon
- 1 Tbsp pumpkin pie spice
- 1/2 tsp salt
- 2 eggs
- 1 1/3 cups canned pumpkin (about 15 oz)
- 1/3 cup vegetable oil
- 2 tsp vanilla extract
Directions
- Preheat oven to 375 degrees F (190 degrees C). Grease and flour 18 muffin cups, or use paper liners.
- Filling: In a medium bowl, beat cream cheese until soft. Add egg, vanilla and brown sugar. Beat until smooth (although small lumps are fine), then put in fridge until ready to use.
- Streusel: In a medium bowl, mix flour, sugar and cinnamon. Add butter and cut it in with a fork until crumbly. Put in fridge until ready to use.
- Batter: In a large bowl, sift together flour, sugar, baking powder, cinnamon and salt. Make a well in the center of flour mixture and add eggs, pumpkin, olive oil and vanilla. Beat together until smooth.
- Place pumpkin mixture in muffin cups about 1/2 full. Then add one tablespoon of the cream cheese mixture right in the middle of the batter. Try to keep cream cheese from touching the paper cup (see notes for additional tips). Sprinkle on the streusel topping.
- Bake at 375 degrees F (195 degrees C) for 20 to 25 minutes.
Ok, video time. This one is great for those of you who are familiar with the little game called Minesweeper. It's hilarious in my opinion...hehe.
Wednesday, November 12, 2008
Pumpkin Cupcakes

Recipe number two! The pumpkin cupcake was very straight forward and easy to do. I topped it with my favorite hint-of-cream-cheese icing recipe which was a perfect match. It's nothing fancy, but very yummy.
Notes
- I've halved the original recipe here. The original makes enough for a double layer cake, but I didn't need that many cupcakes. So just double this for a cake!
Delicious! The frosting has just a little bit of cream cheese so the flavor isn't overwhelming. The cupcakes were moist and delicious. I loved them and Mr. C's co-workers ate all the leftover ones so I think they were a hit. I would make these again (they're right up there as a competitor to my favorite red velvet cake recipe).
I found the cupcake recipe at About.com and the frosting recipe is from (Visions of) Sugar Plum:
Ingredients
- Cupcakes
- 1 cup sugar
- 1/2 cup vegetable oil
- 2 large eggs
- 1 cup all-purpose flour
- 1 tsp baking soda
- 1 tsp ground cinnamon
- 1/4 tsp ground ginger
- 1/2 tsp baking powder
- 1/4 tsp salt
- 1 cup pumpkin puree or cooked mashed pumpkin
- 1/2 cup chopped pecans (I omitted these)
- 1/2 cup milk
- 1/2 cup granulated sugar
- 2 1/2 tbsp all purpose flour
- pinch salt
- 6 tbsp unsalted butter, softened
- 2 ounces cream cheese, softened
- 1 tsp vanilla extract
Directions
- Turn oven to 350 F.
- Combine sugar, vegetable oil and eggs in a large mixing bowl; mix well. Sift dry ingredients into a separate bowl.
- Stir into oil mixture, beating well. Stir in pumpkin puree.
- Pour batter into a lined cupcake pan and bake at 350° for 20 minutes or so? I can't remember precisely how long it took, I just checked in on them every so often until they were done.
- Turn out onto racks to cool.
- To make the frosting whisk together milk, sugar, flour and salt in a medium sized saucepan; bring to a boil, over medium heat, whisking frequently. Continue to boil for 1-2 minutes, or until thickened. Cool in the refrigerator or freezer until completely chilled.
- In a large mixing bowl, using a mixer on medium speed (or just a mixing spoon like I did), beat together butter and cream cheese until creamy, about 1-2 minutes. Beat in vanilla extract and chilled milk mixture, until well combined and fluffy, about 2-3 minutes.
- Spread frosting over cupcakes and enjoy!
Since I added a video in my last recipe I've decided to share a few more. This is unfortunately an April Fool's movie preview (so there won't really be a full length movie, booo) but it was still really cool to see Zelda made into a movie trailer!
Tuesday, November 11, 2008
Pumpkin Chocolate Chip Cookies
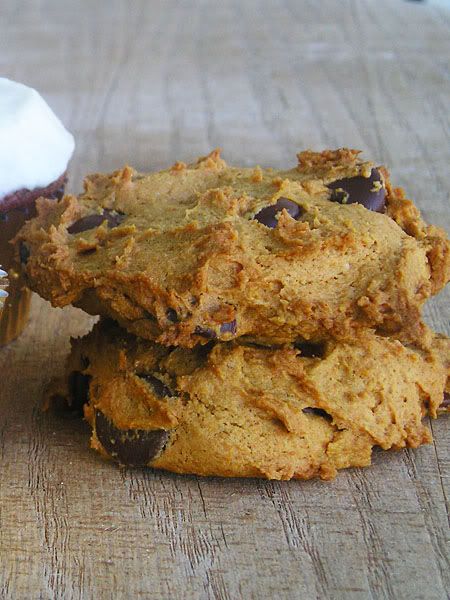
So here is the first pumpkin recipe I will share with you: Pumpkin Chocolate Chip Cookies. This was a time consuming recipe because I tried to drain the pumpkin puree of as much water as I could. See, in researching pumpkin cookie recipes I found that many complaints were that the cookie wasn't firm like a regular old chocolate chip cookie. One suggestion I came across was to squeeze the water out of the pumpkin puree so the batter/dough wasn't so moist. So I went ahead and did just that!
Notes
- As I mentioned, I drained as much water as I could from the pumpkin puree. I laid a paper towel on a plate, smeared all 15 ounces of pumpkin on that and then pressed another paper towel on the puree to soak up water. Once I had soaked as much as I could I would flip the "pumpkin pancake" onto another paper towel and start again. Every once in a while (especially after a lot of water had been removed) I would mix the pumpkin up to redistribute the moisture and soak some more out. I did end up with bone dry pumpkin but it was definitely much more solid and less moist when I was through.
- These cookies don't spread, rise, or change shape at all while cooking. Shape them how you want them before you pop them in the oven because every ridge and spike will still be there when they come out!
- Instead of using the suggested amounts of cinnamon, nutmeg, clove and ginger I used an equal mixture of pumpkin pie spice, cinnamon, nutmeg, and ginger.
Mr. C thought they were pretty yummy. I thought they were good as well - surprisingly I liked them best once they had cooled. Mr. C brought the leftovers to work with him and I believe there was only one left when he brought the tray back home. And finally, the people who received them in my pumpkin-treat-gift-box liked them, but I believe they enjoyed the muffins and cupcakes more. They did still end up muffin-y, but I think the drying-out process did help make them a little heavier than they otherwise would have been.
I found the recipe at YumSugar:
Ingredients
- 2 1/2 cups flour
- 1 tsp salt
- 1 tsp baking soda
- 1 tsp cinnamon
- 1/2 tsp nutmeg
- 1/2 tsp clove
- pinch of ground ginger
- 1/2 cup (1 stick) butter, room temperature
- 1 cup brown sugar
- 1/2 cup sugar
- 1 egg, room temperature
- 15 oz can of pure pumpkin
- 1 tsp vanilla extract
- 1-2 cups chocolate chips (I used dark chocolate - yum!)
Directions
- Preheat oven to 375 F.
- Sift together (or whisk in small bowl) flour, salt, baking soda, cinnamon, nutmeg, clove and ginger together and set aside.
- Beat butter, brown sugar and sugar together in a large mixer bowl. Add the pumpkin and vanilla and mix until incorporated. Then add the egg and beat well until fully incorporated.
- Gradually (I do it in 3 batches) beat the flour mixture into the wet mixture. Stir in chocolate chips.
- Drop rounded spoonfuls onto baking sheets lined with parchment paper and bake for 13-15 minutes until edges start to brown. Remove from oven and let sit on hot baking sheet for 2 more minutes.
- Move cookies to wire rack to cool completely.
And I have an extra something I need to tack onto the end here... My friends Dela and Adam know how much I like the movie The Matrix so they sent me a spoof video called The Matrix Runs on Windows. It cracked me up so I have to share it:
Monday, November 10, 2008
Pumpkin Treats
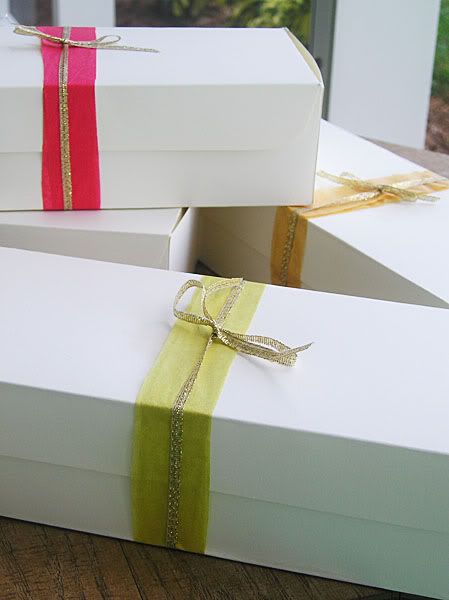
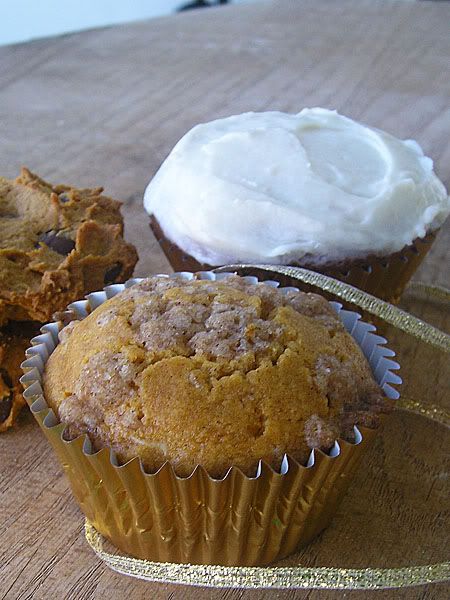
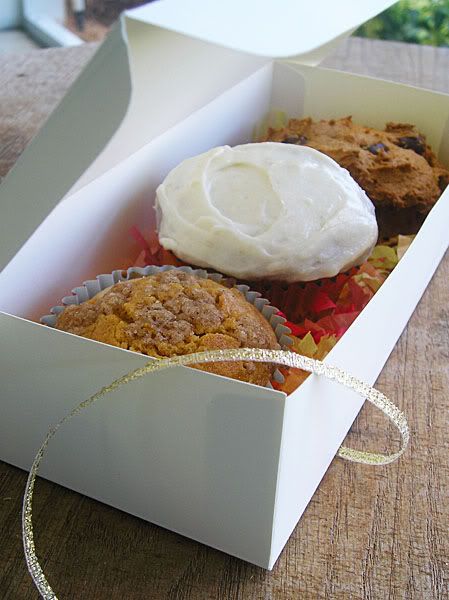
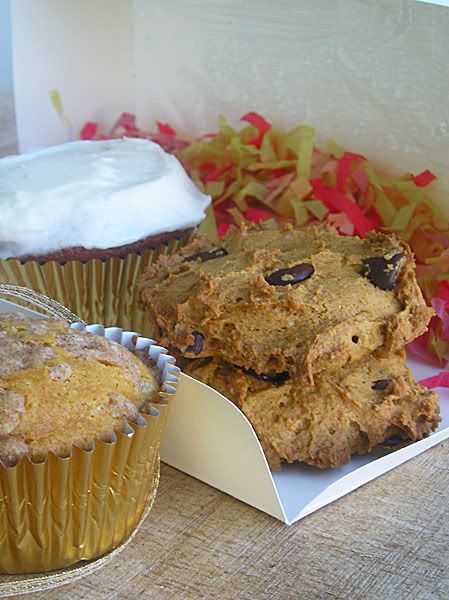
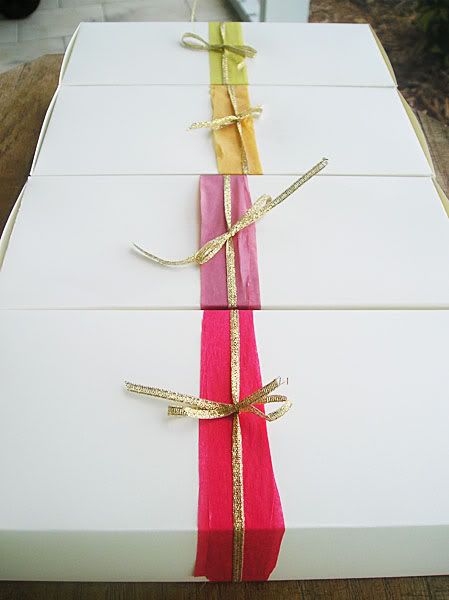 I have a confession to make - I have a thing for pumpkin. When October rolls around I get a hankering to make all sort so of pumpkin-y treats for myself. Things such as pumpkin pancakes, pumpkin bourbon cheesecake, pumpkin muffins, pumpkin cupcakes, pumpkin cookies, etc. So this year I decided to spread the pumpkin love and make some of these goodies for family and friends! I went with my favorite pumpkin cream cheese muffins with a side of pumpkin cupcakes and pumpkin chocolate chip cookies. Not only did I bake the goods, but I also made the boxes! I can be so clever when I put mind to it! Eh, ok, so it's not *that* clever, but I was proud. I even cut up bits of fall-colored tissue paper as a fun colorful filler for inside the boxes. And unfortunately my boxes were just a tad too short for the cupcakes (even after I had cut their tippy-tops off) and by the time I gave them away the oils in the icing had made a little damp spot on the top of the box. Even the tissue paper band and ribbon didn't quite cover it up. Ooops! Let me tell you, I spent all day making these things. Morning to evening! My feet were killing me by the end of the day. I ended up with quite a bit more than I was gift-boxing so Mr. C took the numerous leftovers (after I'd had a day to devour a few) to work where it seems they were a big hit. Always nice to know you're appreciated! I will be posting these recipes in the future as well. Let me tell you though, my secret favorite was the pumpkin muffin... They're so delicious! The cupcakes were my second favorite with the cookie taking third place. Pumpkin cookies are a little bit hard to pull off I found. You can't really get a traditional chocolate chip cookie consistency - they tend to come out sort of muffin-y instead. They were still good though. Hope everyone enjoyed their pumpkin treats! |
    |
Wednesday, November 5, 2008
Ocean Pearls
Hello again! Haven't posted any real creations in a few months because I'm a slacker, but here we go. I actually made these about a month ago - just never took any pictures before now. And the pictures make them look vibrantly blue! Which is quite nice, but not quite true. Yes, they are a nice bright blue, but not as blue as the photos turned out. I won't complain though, I like the effect!
I made them with some cheapo hoop earrings and silver colored wire. I just... started wrapping really. Add a bead, wrap the wire, add a bead, wrap the wire, etcetera, until it ended up as a little web of beads. I actually undid the first pair I made and started over because I wrapped the beads so close together. When I put them on they were just too heavy for my delicate little ears to handle. So the second time around I added half the beads to each earring, and although they're still a bit heavy it's much more bearable!


I made them with some cheapo hoop earrings and silver colored wire. I just... started wrapping really. Add a bead, wrap the wire, add a bead, wrap the wire, etcetera, until it ended up as a little web of beads. I actually undid the first pair I made and started over because I wrapped the beads so close together. When I put them on they were just too heavy for my delicate little ears to handle. So the second time around I added half the beads to each earring, and although they're still a bit heavy it's much more bearable!


Thursday, October 30, 2008
Pin Curls
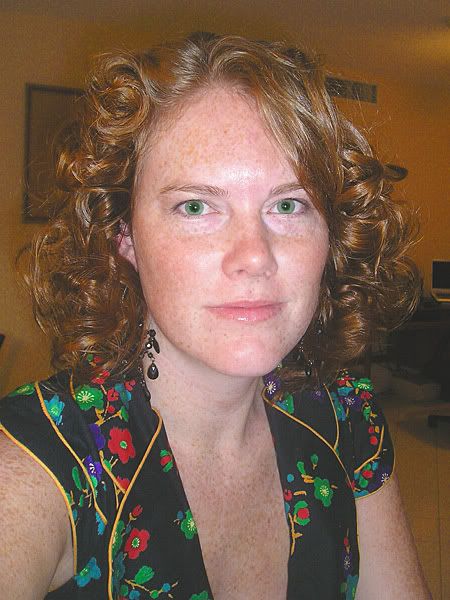
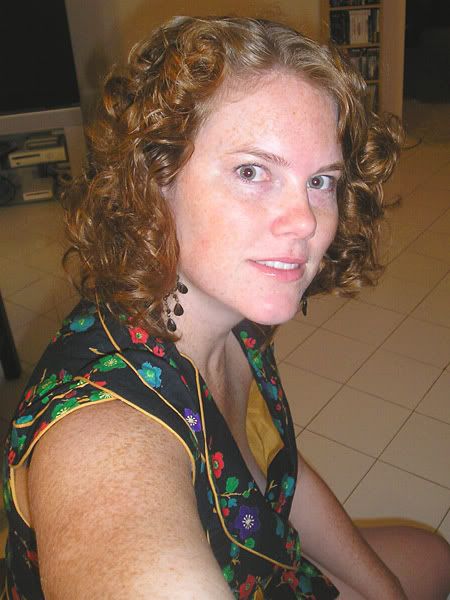
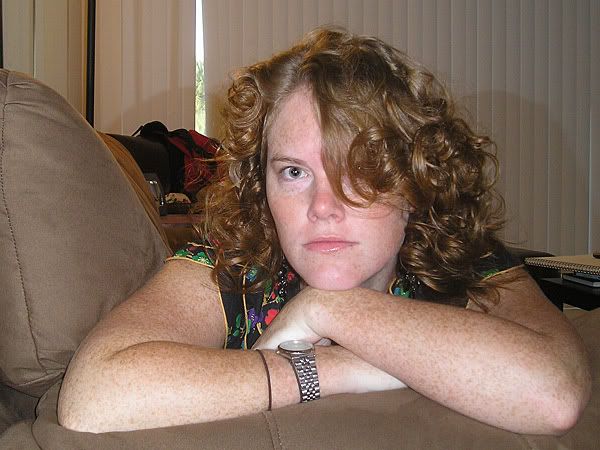
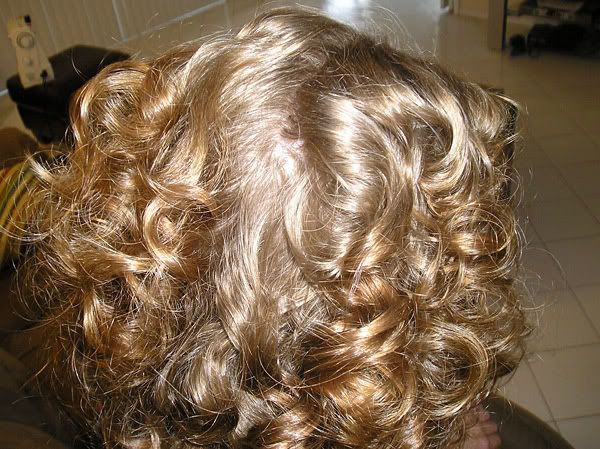
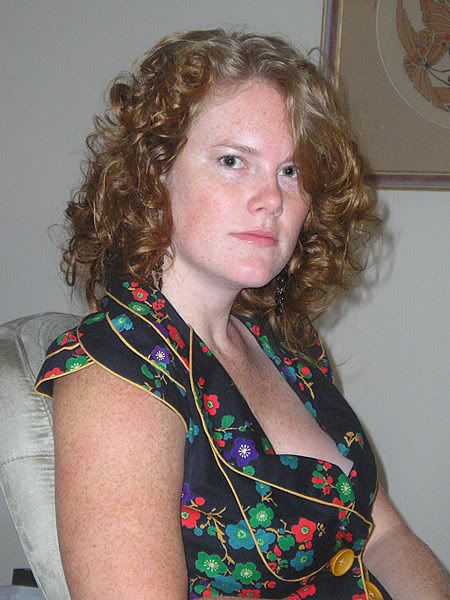 So I tried out curls on my hair for the first time in...a long time. I've done some curling over the years with a curling iron, sure, but the last time I remember curling my hair using an over-night technique was back in elementary school I think. I remember that it was summer and we were staying in Ohio for the funnest two weeks of the year. I guess my cousin or someone had some curlers so we popped them in over night. The next day my hair was awesome as I remember it. I felt like the queen of Bible School the next day with all of my luscious curls.  And here I am again! Inspired by my beautiful friend Laurel at her Bridal Shower. She had the cutest hairdo - all ringlet curls pulled up under an adorable mad-hatter (isn't that a great theme for a party??) top hat bespeckled by feathers and sparkle. Laurel's hair is naturally pretty straight so I was curious to know how she had curled it so nicely. She said she used the pin curl technique which I had never before heard of. I looked it up and discovered it's a technique that was common back in the early 1900's and was still being used even into the 1960's. Since the onset of all our electrical gadgetry these days the pin curl has been replaced by curling irons and hot rollers and such. But since I'm to cheap and lazy to buy any of that crap I decided to give this pin curl thing a go! And here I am again! Inspired by my beautiful friend Laurel at her Bridal Shower. She had the cutest hairdo - all ringlet curls pulled up under an adorable mad-hatter (isn't that a great theme for a party??) top hat bespeckled by feathers and sparkle. Laurel's hair is naturally pretty straight so I was curious to know how she had curled it so nicely. She said she used the pin curl technique which I had never before heard of. I looked it up and discovered it's a technique that was common back in the early 1900's and was still being used even into the 1960's. Since the onset of all our electrical gadgetry these days the pin curl has been replaced by curling irons and hot rollers and such. But since I'm to cheap and lazy to buy any of that crap I decided to give this pin curl thing a go!Here's basically how it worked: I wet my hair down (after an environmentally unfriendly shower that lasted a good 30 minutes... I'm terrible!) and started combing it all into sections. I gave up on that though, sectioning your own hair is tedious work! So I sort of wrapped what I imagined were two inch patches of hair around my thumb (I tried to avoid twisting or twirling as I wrapped) and then secured them down with masses of hair pins . The hair pins I got weren't very good at holding the hair in place because the ends were very loose and open, but since I was told that bobby pins are no good because they would leave creases I did the best I could with the hair pins. I had a crap load of them in my hair!! I must have used about 65-75 which seems like a lot of pins to me. Even then I kept having to push some back in and re pin some curls. Once I had may hair in it's oh-so-messy looking pin curls I went to bed so they could set over night. I woke up restlessly two or three times wanting to take them out so I could see if it had curled or not, but I resisted. When it was finally an appropriate hour of the morning I got up, took all the pins out and gave my hair a bit of a finger-combing. It poofed up and actually looked kind of cute! 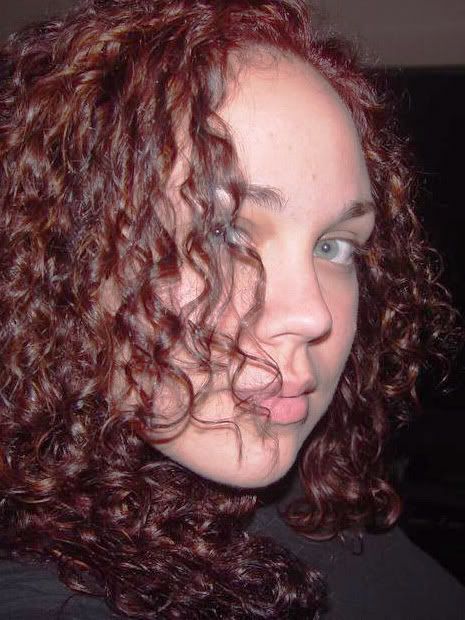 My friend Jessica (who has gorgeous curly hair, the likes of which I could never coax my hair to imitate) said she wanted to see pictures if I did indeed curl my hair. So I threw on some makeup and set my camera timer to take some photos. And here you have it - Sarah with curly hair! Please forgive the tired look in these pictures, they were taken literally about 15 minutes after I woke up... My friend Jessica (who has gorgeous curly hair, the likes of which I could never coax my hair to imitate) said she wanted to see pictures if I did indeed curl my hair. So I threw on some makeup and set my camera timer to take some photos. And here you have it - Sarah with curly hair! Please forgive the tired look in these pictures, they were taken literally about 15 minutes after I woke up...I've no idea how long they'll last today. I didn't put any mousse or anything in when I curled them up so it might uncurl by this evening. But it's fun to see one's hair done differently than normal. I'd like to one day try curling using rags, and also rollers to see if it comes out differently. Knowing me it might be a while though! So I'll enjoy the curls while I have them! |
    |
Thursday, July 24, 2008
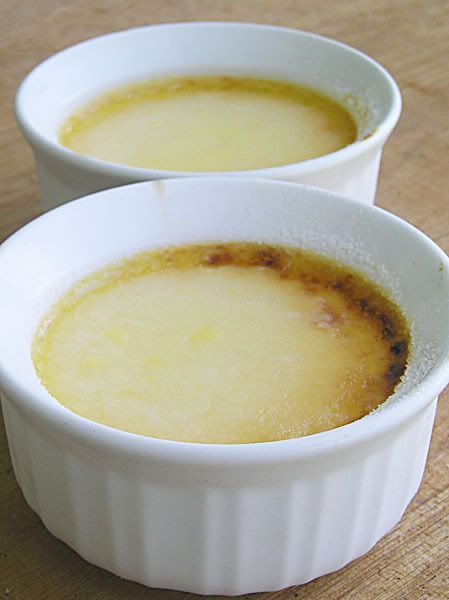
Creme Brulee
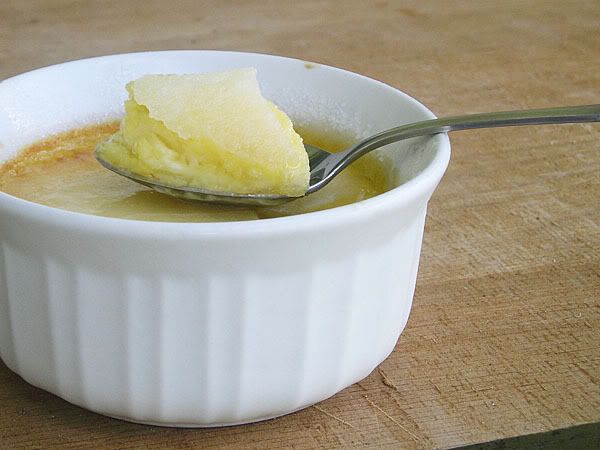
Yes, delicious creme brulee. And see that lovely little ramekin that it's in? That was bought for me (along with three others) by the wonderful Mr. C for my Birthday! Yes, I recently had a birthday. The big two six. It was a very good birthday though, despite the fact that I am, once again, one year older. Nah, getting older has it's perks too I'm sure. I mean, once you hit 65 it's like you're a student again - cheap(er) movie tickets, all right!
So for the Birthday celebrations my Mom cooked up a delicious curry for the family and friends that came over. She did a great job, especially with the toppings which included: shredded coconut, peanuts, mango, kiwi, homemade ginger-glazed walnuts, homemade candied ginger, and possibly some other yummy items I can't currently recall. And yes, when I say "homemade" I do mean that my Mom made them herself (she uses the left over syrup from the candied ginger to glaze the walnuts - how clever is that). So I guess what I'm driving at here is that dinner was indeed delicious.
Lots of sitting around talking and laughing, a bit of frantic gecko catching (we didn't end up successfully catching him though), some present opening. I was actually really surprised that I got any presents! I really wasn't expecting anything, so I felt all warm and fuzzy when I got stuff. I even took pictures! I especially love that one t-shirt with the little cloud - he's "passing lighting." Get it?? And then he's all embarrassed in the last frame. So cute. And the "I *heart* lamp" shirt has significance to me personally. Lamps are very important to me. And for anyone interested I will will discreetly post my WistList here... Very discreetly...
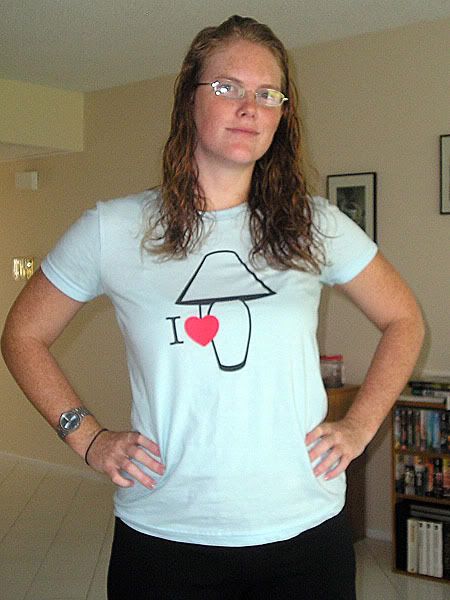

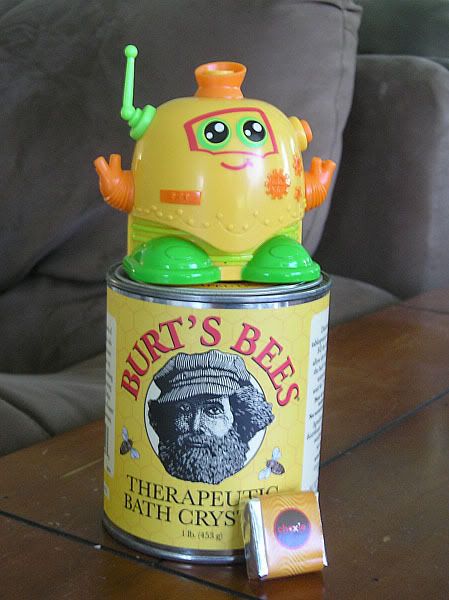
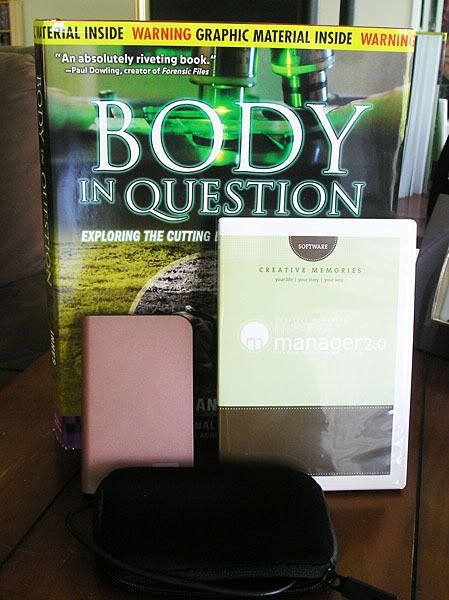
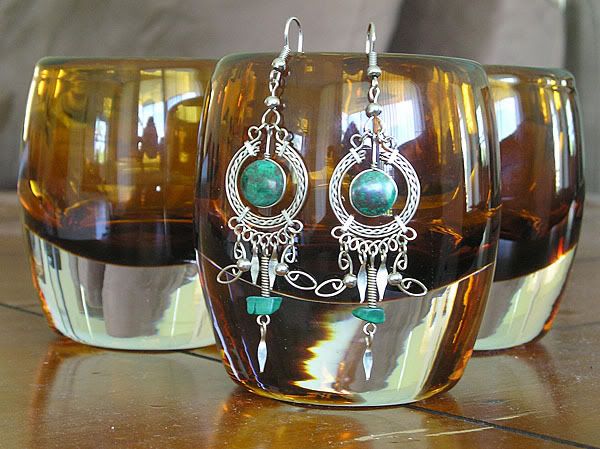

And I have to mention the dessert - Pavlova. No birthday is truly complete without a Pavlova. And Mom makes the best Pavolva you have ever tasted. I don't think I've ever met a person that hasn't thought it was delicious. Even the picky eater at the party liked it enough that he wanted to bring home a slice. It was topped with whipped cream (real whipped cream, not that spray-can crap), strawberries, kiwi, and home grown passion fruit. Man it was good! So thank you to Mom for yet another incredible Pavlova! I should post that recipe one day actually...
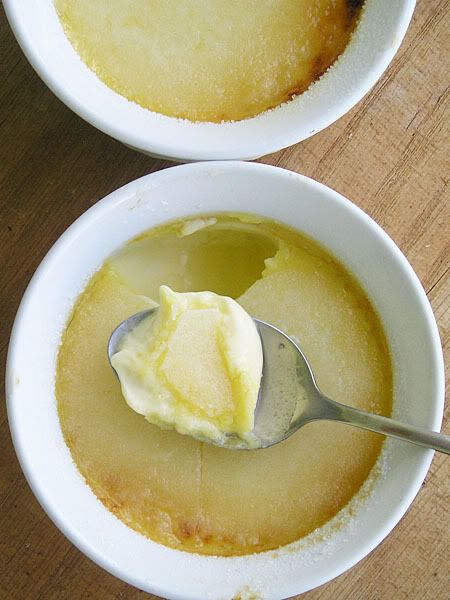
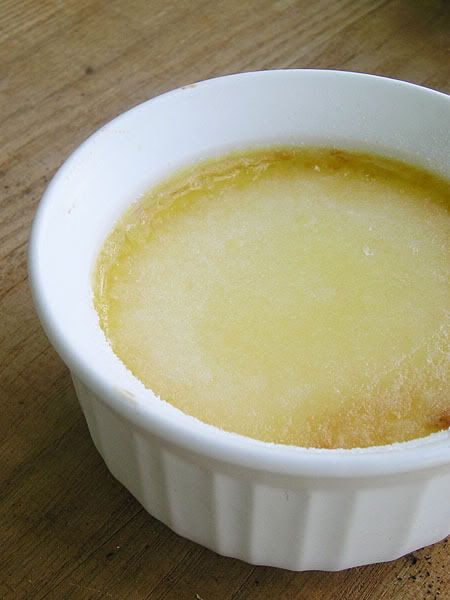
Ok, it's finally creme brulee time. Since I got those little ramekins I had to try and make something. Mr. C and I watch Hell's Kitchen and they frequently have this as a dessert so I decided to give it a shot. Easy enough to make. Since it used only egg yolks I saved the whites and made myself a corn-and-cheese omelet the next day, hehe. I've put my thoughts about this dessert in the verdict section.
Notes
- When adding the final hard-sugar topping I think I added too much sugar. When I put it under the broiler (even though the ramekins said "no broilers allowed") to melt the sugar it made a really thick topping. You had to bang it pretty good with the spoon to get through to the creme part.
It was good but over all I just wasn't too excited about the end result. I've never had creme brulee before though, so maybe I'm just not a big creme brulee fan. It was very creamy and smooth, which I'm assuming is a good thing, but for me it was just too smooth. I also think I would add a bit more sugar if I made it again. O, and the lack of a little blow torch to brown the sugar was a bit disappointing.
And here's the super-simple recipe from About: Gourmet Food (I used half this recipe because 8 creme brulees is a lot):
Ingredients
- 4 cups heavy cream
- 8 egg yolks
- 1/2 cup sugar, plus extra for sprinkling
- 1 Tbsp vanilla extract
Directions
- Preheat oven to 300° F. In a saucepan over medium heat, combine cream and 1/2 cup sugar. Cook while stirring until cream just begins to bubble (about 4-5 minutes).
- In a bowl, beat egg yolks and vanilla until well blended. Yolks will become a light yellow. Gradually pour hot cream into yolks, stirring constantly. If the mixture looks a bit grainy, strain mixture through a sieve set over a bowl.
- Pour the custard into 8 6-oz ramekins (custard cups). Place ramekins in a baking dish and add hot water to fill pan halfway up the side of the ramekins.
- Bake until set, about 40-45 minutes, until custard is mostly firm but the centers of the custards shake gently when tapped. Remove from the oven and allow the ramekins to cool slightly.
- Remove the ramekins from the pan and refrigerate overnight. Just before serving, sprinkle the custards with 2 teaspoons sugar and caramelize the topping by placing under broiler until sugar is a golden brown (about 3 minutes). Watch carefully to not burn the sugar. Alternatively, use a handheld propane or butane torch to caramelize the sugar.
- Optional: Top finished custards with fresh berries, mango or peach slices, or other fresh fruit.
Subscribe to:
Posts (Atom)

