Showing posts with label baking. Show all posts

Thursday, March 5, 2009

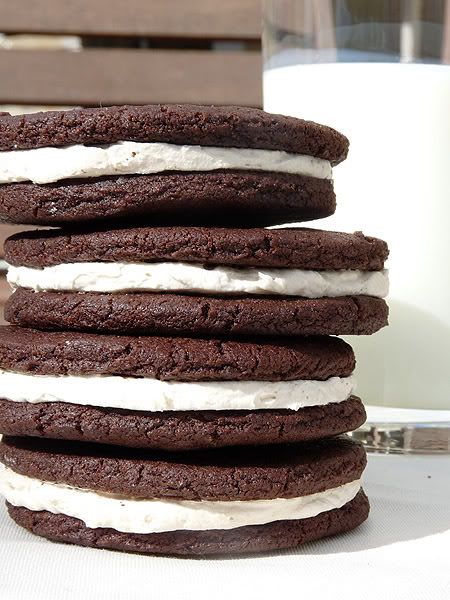
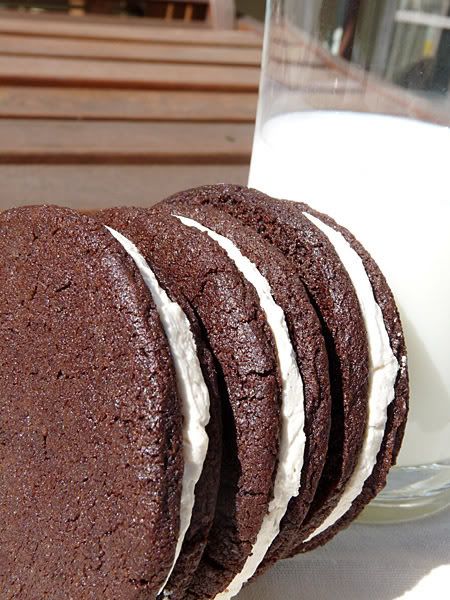
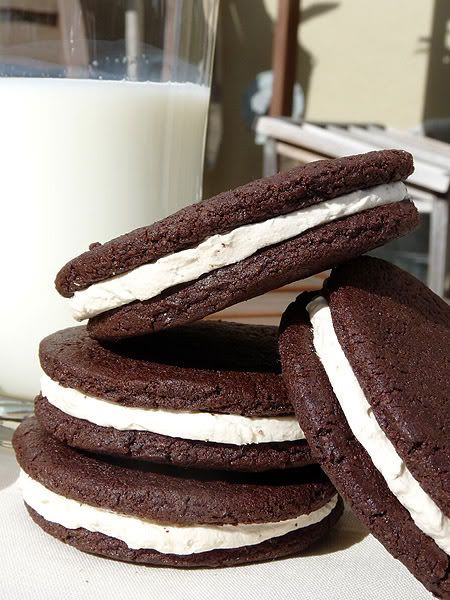
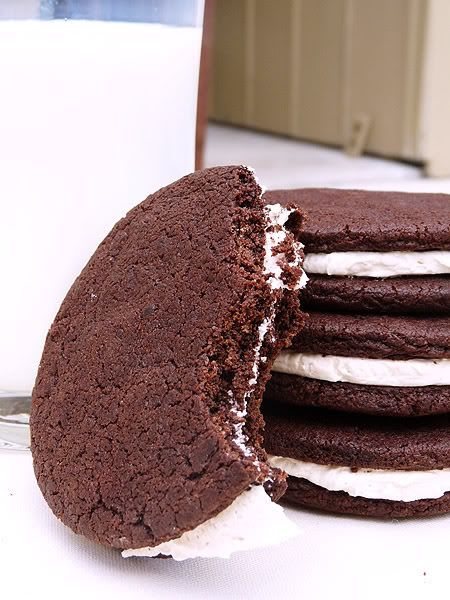
Homemade Oreo Cookies


Although this blog will be temporarily turning into a travel blog, I have plans to squeeze in a few more recipes before the plane takes off. I have a month to do almost nothing, and so far I have turned to cooking to keep me occupied. I made a delicious Penne with Mushroom Marinara dish just the other night (although I replaced the chicken with Italian Saugage, yum). And these Tangerine Cupcakes have been marinating in my brain for a couple of days now. And last night I went ahead (at the urging of my boyfriend) and made some imitation Oreo Cookies!

They were fun to make once I got past the butter dilemma, which I will detail for ya'll in the notes section. I made mine nice and big - mainly because I didn't have any small cookie cutters. Actually, I didn't have any cookie cutter and had to use the opening of a wine-glass. It worked out pretty darn well though. And now I can make my own, much healthier Oreo (at least in regards to the trans-fat issue - they're still dripping with calories).

Notes
  1. I suggest using an actual stick of butter with Tbsp markings on it. I thought I would be able to just measure out spoonfuls of soft butter in a regular tablespoon, but that left me with a very dry bowl of cookie mix. I ended up adding more butter until it looked right. And "right" was when the mixture mostly stuck to itself while mixing, and I could easily pack it into a greasy little ball in my hand.
  2. I didn't have any shortening for the cream filling so I just used butter. All butter and no shortening still makes a good cream filling. I also added the powdered sugar bit by bit until it was the consistency that I wanted.
  3. I suggest actually using an electric mixer to mix the filling. I mixed by hand at first and was disappointed at how flat and dense it was. After a couple minutes of beating with the mixer it was a bi lighter and fluffier. Not a huge difference, but enough that it was worth it to me.
  4. Shaping the cookies: I did not use a rolling pin. Instead, I took one handful at a time and pressed it to between 1/8 - 1/4" on a sheet of tin foil (make sure your tin foil is sized to fit on your baking sheet). Then I took my make-shift cookie cutter (ie: wine glass) and pressed it in, twisting a few times to break through those pesky sugar crystals. Peel back the remaining dough and use it for your next cookie. Once your tin foil is full of cookies, slide it onto your baking tray and just cook them right there on the foil. Easy transfer and easy clean up.
The Verdict

I personally thought they were great! I mean, they don't taste exactly like an actual Oreo, but if you want a chocolate, cream-filled cookie they hit the spot. And it feels so much better to eat a homemade cookie than those preservative-filled ones at the store. Mr. C says "Delish." He actually fought me for the last bite of one we shared last night... And Mom highly approves. She even took one to work to have with her lunch today. So yes, an overall success!!


I found the recipe at the incredible Cupcake Project (who got it from Heaven is Chocolate, Cheese, and Carbs, who got it from Smitten Kitchen, who got it from a book called Retro Desserts). Phew:

Ingredients

Cookie:
  • 1 1/4 cup all-purpose flour
  • 1/2 cup unsweetened cocoa powder
  • 1 tsp baking soda
  • 1/4 tsp baking powder
  • 1/4 tsp salt
  • 1 cup sugar
  • 10 Tbsp butter, room temperature
  • 1 large egg
Cream Filling:
  • 1/4 cup unsalted butter, room temperature
  • 1/4 cup vegetable shortening (I replaced this with more butter)
  • 2 cups powdered sugar, sifted
  • 2 tsp vanilla extract
Makes 20 3" cookies, or 10 assembled cookies.

Directions
  1. Dough: In a medium-sized bowl, mix the flour, cocoa, baking soda and powder, salt, and sugar.

  2. Beat in the butter and the egg. Continue mixing until dough comes together in a mass.

  3. Take rounded teaspoons of batter and place on a parchment paper-lined baking sheet approximately 2 inches apart. With moistened hands, slightly flatten the dough. (see the "Notes" for more tips!)

  4. Bake for 9 minutes at 375 F. Be sure not to over cook them! Set on a rack to cool.

  5. Cream Filling: Place butter and shortening in a mixing bowl, and at low speed, gradually beat in the sugar and vanilla. Turn the mixer on high and beat for 2-3 minutes until filling is light and fluffy.

  6. To make a cookie, pipe teaspoon-sized blobs of cream into the center of a cookie using a pastry bag with a 1/2 inch round tip. (or, if you're like me just plop a blob of filling in the center of a cookie). Place another cookie, equal in size to the first, on top of the cream. Lightly press (I found spinning to be helpful too), to work the filling evenly to the outsides of the cookie. Continue this process until all the cookies have been sandwiched with cream.



Tuesday, December 30, 2008

Sugar Cookies


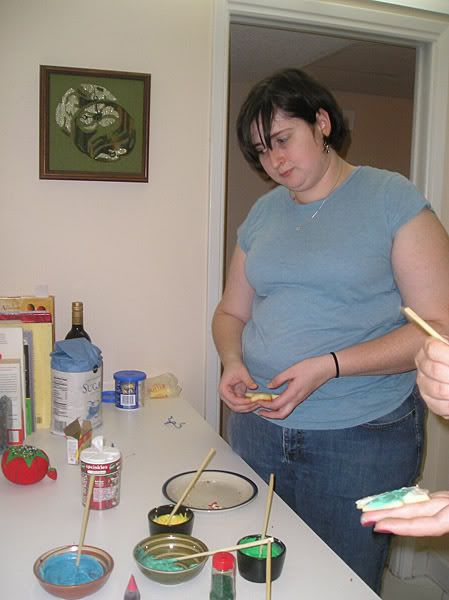
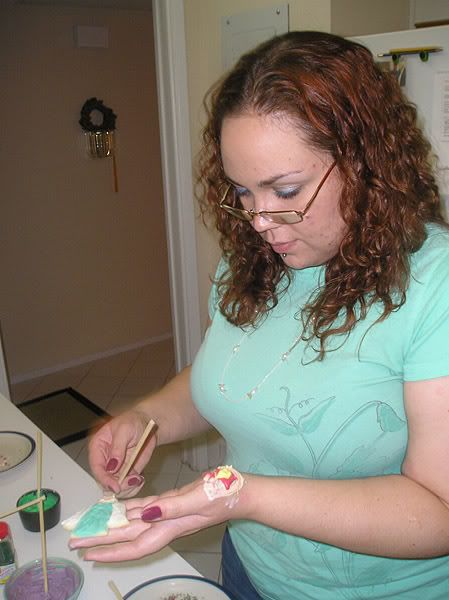
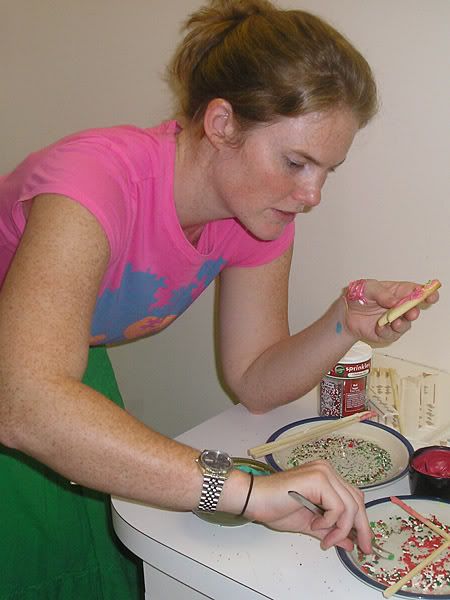
So for the lovely month of December I did as I have done for the past two years and had myself a Cookie Decorating Party. Well, it wasn't quite a party - more like a small gathering I suppose. But that's beside the point! I had friends over and forced them into slave labor not only by making them bake and decorate cookies, but also by making them decorate my tree!! They liked it though, I'm sure.

But really, this time of year is the time to get together with friends and family and I was really grateful to have my friends close by me this year. The past three years I had been in California, where I developed what I'm now calling my Cookie Decoration Tradition with Mr. C. I am very happy to be able to share it with some more of the very special people in my life!


So yes, Dela, Jessica and I slaved away in the kitchen stirring up the dough, rolling it out, cutting little cookie shapes. Then after they were baked and cooled the truly challenging part came. One never does realize how few creative ideas one has until they are confronted with 30 or so cookies to decorate. Let me tell you, it's daunting. I usually start off with a couple of bland creations as I warm up to the task. Then I pop out a few really snazzy, dazzling cookies and am suddenly left drained of inspiration. That's when I just slather on some icing, toss a few sprinkles and call it done. They all look great lined up on the tray no matter what though! By the way, pictured to the right are two of my more amusing creations: the top cookie is me, middle is Dela, and the bottom is Jess (she made that one). Anyways, the true purpose of this blog entry is to share with you the wonderful recipe for sugar cookies that I have successfully used thus far, so I'll move on to that part.

Notes
  1. The cookies retain their shape and size while baking - they won't spread or get poofy, so make them pretty before you pop them in the oven!
  2. I don't recommend skipping the chilling of the dough - it makes it much easier to work with when it's nice and chilled. And to keep it all manageable I only worked with a small ball of dough at a time, leaving the rest to stay cool in the fridge. After I rolled it out and cut some cookies once, I balled up the scraps, put the back in the fridge and pulled off another ball of already-chilled dough. Rinse and repeat.
The Verdict

Of course they were good. I imagine it's hard to mess up sugar cookies, but I do particularly like the density and texture of these ones. They're weighty enough to hold their own with a nice thick frosting slathered on top. Mr. C liked them too, as you can see to the left.
The recipe is from trusty old AllRecipes.com and submitted by Jill Saunders:


Ingredients
  • 1 1/2 cups Butter, softened
  • 2 cups White Sugar
  • 4 Eggs
  • 1 tsp Vanilla Extract
  • 5 cups All-purpose Flour
  • 2 tsp Baking Powder
  • 1 tsp Salt

  • Frosting (I bought some Betty Crocker frosting at the store, Eeeps! I'm terrible, I know!)
  • Various Sprinkles
Makes about 60 cookies (depending on how thick you roll them).

Directions
  1. In a large bowl, cream together butter and sugar until smooth. Beat in eggs and vanilla. Stir in the flour, baking powder, and salt.

  2. Cover, and chill dough for at least one hour (or overnight).

  3. Preheat oven to 400 degrees F (200 degrees C). Roll out dough on floured surface 1/8 to 1/4 inch thick. Cut into shapes with any cookie cutter. Place cookies 1 inch apart on ungreased cookie sheets.

  4. Bake 6 to 8 minutes in preheated oven. Cool completely.

  5. Slather with frosting and sprinkles.

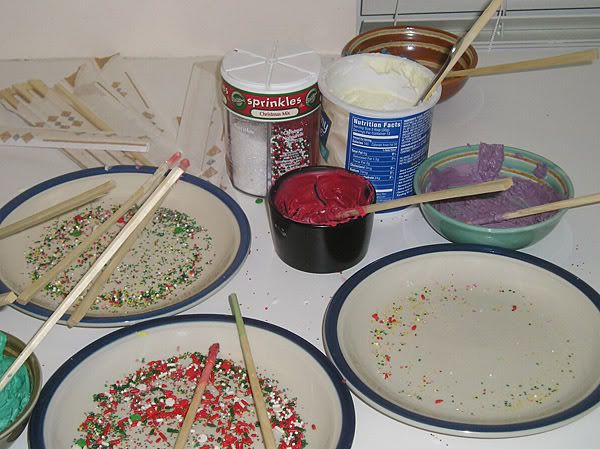
Frosting Tips: Let me share our frosting set-up. We made multiple colors of frosting by just mixing food coloring to our hearts desire with white frosting. If you need to soften your frosting a bit just stick it in the microwave for 5 seocnds (no more than 5 seconds at a time!). We used disposable chopsticks to spread the frosting as I decided butter knives would be far to unwieldy. And we put the cookies on plates when we used sprinkles so they wouldn't go all over my kitchen.


Thursday, November 13, 2008

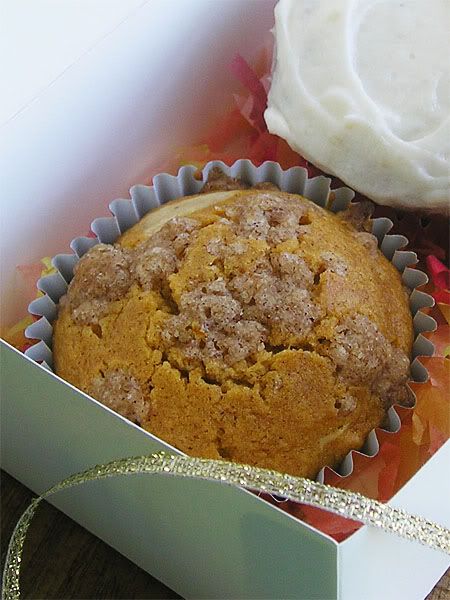
Pumpkin Cream Cheese Muffins


Here is the third and final recipe from my pumpkin-treats collection. This is the best of the three with it's complex combination of complementary flavors creating a combustion of creative climax! Woohoo, alliteration is useful for more than just high school english class! But yes, as I was saying, these muffins are delicious. And easy despite requiring numerous bowls.

Notes
  1. When filling the cupcake pan I take about a tablespoon of batter and kind of spread it on the bottom and sides of the cupcake liner, leaving an empty space to dollop in the cream cheese mixture. Then I fill it the rest of the way with the muffin batter and top with streusel.
  2. Alternately, I will also fill the liner 2/3 with muffin batter and do the best I can to make a little well in the middle and fill it with cream cheese mixture. This way you can see the cream cheese before you even bite into the muffin.
  3. If you prefer a lighter muffin feel free to replace the brown sugar in the muffin batter with white sugar. Alternately, replace the white sugar with brown for a heavier muffin.
The Verdict

Delicious delicious delicious. These were by far the hit. Mr. C's boss made a point of telling him how good they were; Mr. C, my Mom and my sister both liked them best; I think they were the best of the bunch. And if one is allowed to use compliments from previous years, they were well-received at the pumpkin carving party I made them for last year. These are killer muffins! The cream cheese mixture isn't too strong in flavor and isn't mushy or anything and the streusel adds a nice sweet crispiness to the top of the muffin.

The recipe is from trusty old AllRecipes.com and submitted by Barb:

Ingredients
    Filling
  • 1 package cream cheese, 8 oz
  • 1 egg
  • 1 tsp vanilla extract
  • 3 Tbsp brown sugar
    Streusel
  • 3 1/2 Tbsp all-purpose flour
  • 5 Tbsp brown sugar
  • 3/4 tsp ground cinnamon
  • 4 Tbsp butter
    Batter
  • 2 1/2 cups all-purpose flour
  • 1 cup white sugar
  • 1 cup brown sugar
  • 2 tsp baking powder
  • 1 tsp ground cinnamon
  • 1 Tbsp pumpkin pie spice
  • 1/2 tsp salt
  • 2 eggs
  • 1 1/3 cups canned pumpkin (about 15 oz)
  • 1/3 cup vegetable oil
  • 2 tsp vanilla extract
Makes about 18 muffins.

Directions
  1. Preheat oven to 375 degrees F (190 degrees C). Grease and flour 18 muffin cups, or use paper liners.

  2. Filling: In a medium bowl, beat cream cheese until soft. Add egg, vanilla and brown sugar. Beat until smooth (although small lumps are fine), then put in fridge until ready to use.

  3. Streusel: In a medium bowl, mix flour, sugar and cinnamon. Add butter and cut it in with a fork until crumbly. Put in fridge until ready to use.

  4. Batter: In a large bowl, sift together flour, sugar, baking powder, cinnamon and salt. Make a well in the center of flour mixture and add eggs, pumpkin, olive oil and vanilla. Beat together until smooth.

  5. Place pumpkin mixture in muffin cups about 1/2 full. Then add one tablespoon of the cream cheese mixture right in the middle of the batter. Try to keep cream cheese from touching the paper cup (see notes for additional tips). Sprinkle on the streusel topping.

  6. Bake at 375 degrees F (195 degrees C) for 20 to 25 minutes.


Ok, video time. This one is great for those of you who are familiar with the little game called Minesweeper. It's hilarious in my opinion...hehe.


Wednesday, November 12, 2008

Pumpkin Cupcakes


Recipe number two! The pumpkin cupcake was very straight forward and easy to do. I topped it with my favorite hint-of-cream-cheese icing recipe which was a perfect match. It's nothing fancy, but very yummy.

Notes
  1. I've halved the original recipe here. The original makes enough for a double layer cake, but I didn't need that many cupcakes. So just double this for a cake!
The Verdict

Delicious! The frosting has just a little bit of cream cheese so the flavor isn't overwhelming. The cupcakes were moist and delicious. I loved them and Mr. C's co-workers ate all the leftover ones so I think they were a hit. I would make these again (they're right up there as a competitor to my favorite red velvet cake recipe).

I found the cupcake recipe at About.com and the frosting recipe is from (Visions of) Sugar Plum:

Ingredients
    Cupcakes
  • 1 cup sugar
  • 1/2 cup vegetable oil
  • 2 large eggs
  • 1 cup all-purpose flour
  • 1 tsp baking soda
  • 1 tsp ground cinnamon
  • 1/4 tsp ground ginger
  • 1/2 tsp baking powder
  • 1/4 tsp salt
  • 1 cup pumpkin puree or cooked mashed pumpkin
  • 1/2 cup chopped pecans (I omitted these)
Frosting
  • 1/2 cup milk
  • 1/2 cup granulated sugar
  • 2 1/2 tbsp all purpose flour
  • pinch salt
  • 6 tbsp unsalted butter, softened
  • 2 ounces cream cheese, softened
  • 1 tsp vanilla extract
Makes about 12 cupcakes.

Directions
  1. Turn oven to 350 F.

  2. Combine sugar, vegetable oil and eggs in a large mixing bowl; mix well. Sift dry ingredients into a separate bowl.

  3. Stir into oil mixture, beating well. Stir in pumpkin puree.

  4. Pour batter into a lined cupcake pan and bake at 350° for 20 minutes or so? I can't remember precisely how long it took, I just checked in on them every so often until they were done.

  5. Turn out onto racks to cool.

  6. To make the frosting whisk together milk, sugar, flour and salt in a medium sized saucepan; bring to a boil, over medium heat, whisking frequently. Continue to boil for 1-2 minutes, or until thickened. Cool in the refrigerator or freezer until completely chilled.

  7. In a large mixing bowl, using a mixer on medium speed (or just a mixing spoon like I did), beat together butter and cream cheese until creamy, about 1-2 minutes. Beat in vanilla extract and chilled milk mixture, until well combined and fluffy, about 2-3 minutes.

  8. Spread frosting over cupcakes and enjoy!

Since I added a video in my last recipe I've decided to share a few more. This is unfortunately an April Fool's movie preview (so there won't really be a full length movie, booo) but it was still really cool to see Zelda made into a movie trailer!


Tuesday, November 11, 2008

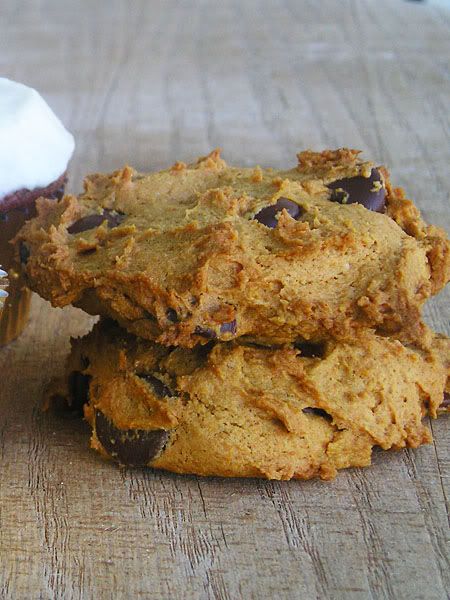
Pumpkin Chocolate Chip Cookies


So here is the first pumpkin recipe I will share with you: Pumpkin Chocolate Chip Cookies. This was a time consuming recipe because I tried to drain the pumpkin puree of as much water as I could. See, in researching pumpkin cookie recipes I found that many complaints were that the cookie wasn't firm like a regular old chocolate chip cookie. One suggestion I came across was to squeeze the water out of the pumpkin puree so the batter/dough wasn't so moist. So I went ahead and did just that!

Notes
  1. As I mentioned, I drained as much water as I could from the pumpkin puree. I laid a paper towel on a plate, smeared all 15 ounces of pumpkin on that and then pressed another paper towel on the puree to soak up water. Once I had soaked as much as I could I would flip the "pumpkin pancake" onto another paper towel and start again. Every once in a while (especially after a lot of water had been removed) I would mix the pumpkin up to redistribute the moisture and soak some more out. I did end up with bone dry pumpkin but it was definitely much more solid and less moist when I was through.
  2. These cookies don't spread, rise, or change shape at all while cooking. Shape them how you want them before you pop them in the oven because every ridge and spike will still be there when they come out!
  3. Instead of using the suggested amounts of cinnamon, nutmeg, clove and ginger I used an equal mixture of pumpkin pie spice, cinnamon, nutmeg, and ginger.
The Verdict

Mr. C thought they were pretty yummy. I thought they were good as well - surprisingly I liked them best once they had cooled. Mr. C brought the leftovers to work with him and I believe there was only one left when he brought the tray back home. And finally, the people who received them in my pumpkin-treat-gift-box liked them, but I believe they enjoyed the muffins and cupcakes more. They did still end up muffin-y, but I think the drying-out process did help make them a little heavier than they otherwise would have been.

I found the recipe at YumSugar:

Ingredients

  • 2 1/2 cups flour
  • 1 tsp salt
  • 1 tsp baking soda
  • 1 tsp cinnamon
  • 1/2 tsp nutmeg
  • 1/2 tsp clove
  • pinch of ground ginger
  • 1/2 cup (1 stick) butter, room temperature
  • 1 cup brown sugar
  • 1/2 cup sugar
  • 1 egg, room temperature
  • 15 oz can of pure pumpkin
  • 1 tsp vanilla extract
  • 1-2 cups chocolate chips (I used dark chocolate - yum!)
Makes about 26 or so cookies.

Directions
  1. Preheat oven to 375 F.

  2. Sift together (or whisk in small bowl) flour, salt, baking soda, cinnamon, nutmeg, clove and ginger together and set aside.

  3. Beat butter, brown sugar and sugar together in a large mixer bowl. Add the pumpkin and vanilla and mix until incorporated. Then add the egg and beat well until fully incorporated.

  4. Gradually (I do it in 3 batches) beat the flour mixture into the wet mixture. Stir in chocolate chips.

  5. Drop rounded spoonfuls onto baking sheets lined with parchment paper and bake for 13-15 minutes until edges start to brown. Remove from oven and let sit on hot baking sheet for 2 more minutes.

  6. Move cookies to wire rack to cool completely.


And I have an extra something I need to tack onto the end here... My friends Dela and Adam know how much I like the movie The Matrix so they sent me a spoof video called The Matrix Runs on Windows. It cracked me up so I have to share it:


Tuesday, July 22, 2008

Peach Lattice Cake


I'm back already! Thought I'd treat everyone to two posts today in an attempt to make up for my negligence. But first I need to turn down the A/C... ... ...There, much better! Ok!

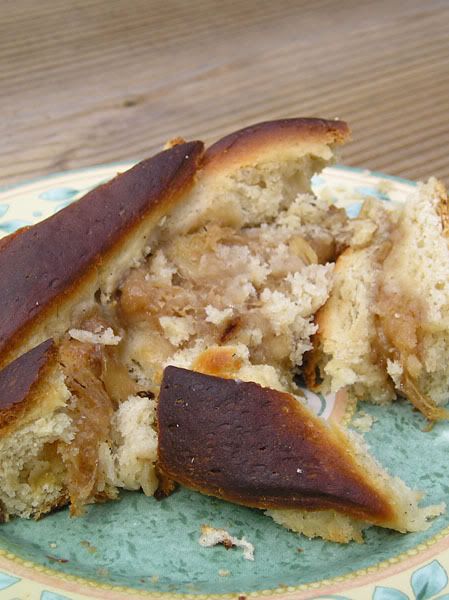
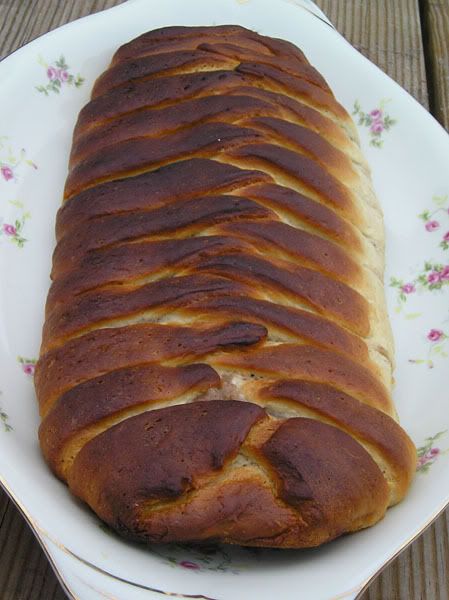
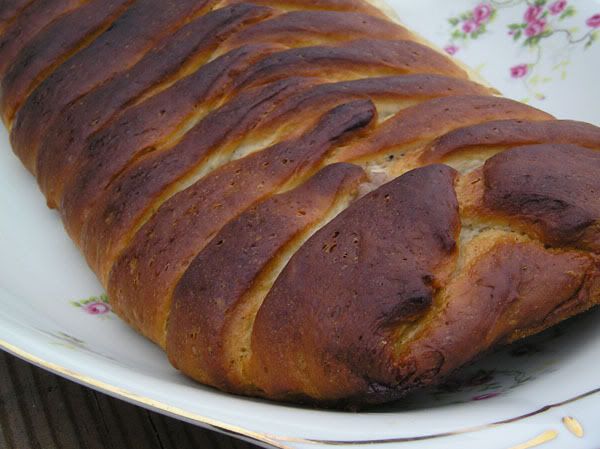
Now this creation was completed a while ago as well - remember how in my earlier post I said I've been lazy? That includes cooking laziness too. But when it was made it was a large thing - almost 1 1/2 feet long! I couldn't (or perhaps I should say "shouldn't") eat that whole thing by myself, so I brought it over to my Mom's house to share with the family.

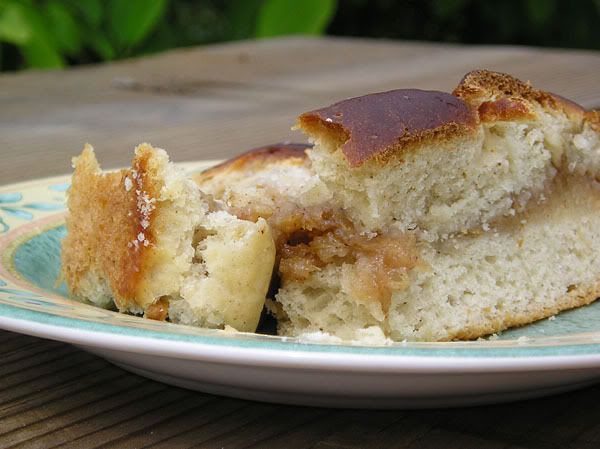
Although the original recipe I used called for an apple filling I decided to wander off the beaten path and try a white peach filling. So I bought my peaches and coldly told Mr. C with a wag of my finger "Now don't go eating none of those peaches, hear??" until I was ready to get down to business. I was very happy with my dough consistency - it was very delicate and dainty (yes, I do realize that's an odd way to describe dough). And although I think I over-cooked the peach filling it still came out tasting delicious. It wasn't until afterwards that I thought perhaps peaches didn't need as much softening up as apples.

And last of all, I was sad that it came out looking burnt. But I was happy that it didn't taste burnt. I guess you can't win every time, huh? It was also a kind of difficult dish for me to photograph. It might have been prettier if I'd had some ice cream or fruit slices or the glaze that was supposed to go on top but I didn't make. Oh well, good enough!

Notes
  1. I decided to use peaches instead of apples. I didn't change anything except the apples - everything else stayed the same. The only thing I might do different if I made this again would be to not cook the peaches so long. The only problem there is that it took a long time for the sauce to get thick enough to make a nice filling. I have a feeling I might have had very juicy peaches though.
  2. My dough was fairly sticky. I didn't want to add too much extra flour because I wanted a nice tender dough, so when I did the kneeding I used the rubber spatula in one hand to help lift the dough and used the other hand to quickly push the dough into itself. Still kinda messy, but better than it would have been had I stuck both hands in there.
The Verdict

I thought it came out really good! And my Mom, sister, and friend all said they liked it. I do think it could have used more filling. I would make this again though - would love to try other fillings too.


Here is the recipe from Technicolor Kitchen:


Ingredients

Dough:
  • 2 Tbsp warm water (105ºF to 115ºF)
  • 1 package (2 1/4 teaspoons) active dry yeast

  • 1/2 cup whole milk
  • 6 Tbsp sugar
  • 5 Tbsp unsalted butter, diced, room temperature
  • 1 tsp salt
  • 2 large egg yolks
  • 1 tsp finely grated orange zest
  • 1/2 tsp ground cardamom
  • 1/4 tsp ground nutmeg
  • 2 to 2 1/4 cups all purpose flour
Filling:
  • 2 Tbsp unsalted butter
  • 6 Tbsp (packed) golden brown sugar
  • 1 1/4 pounds Golden Delicious apples (about 3 medium), peeled, cored, quartered, cut crosswise into 1/4 inch slices (I used white peaches instead)
  • 1 tsp finely grated orange zest
  • 1 tsp finely grated lemon zest
  • 1/2 tsp ground cinnamon
  • 1/8 tsp ground cardamom
  • 1/8 tsp ground nutmeg

  • Nonstick vegetable oil spray or vegetable oil
  • 1/3 cup vanilla wafers
Glaze: (I didn't make this or any glaze)
  • 1 1/2 cups powdered sugar
  • 2 Tbsp (or more) orange juice
Makes 8-10 servings.

Directions
  1. Dough: Place 2 tablespoons warm water in small cup. Mix in yeast. Let stand until yeast dissolves, about 6 minutes.

  2. Stir milk, sugar, butter, and salt in medium saucepan over medium-low heat just until sugar dissolves and butter melts (mixture should be just warm). Scrape milk mixture into large bowl; cool to lukewarm if necessary. Whisk in yeast mixture, egg yolks, orange peel, and spices. Add 2 cups flour; mix with rubber spatula until dough comes together. Turn dough out onto floured work surface. Knead until smooth and silky, sprinkling with more flour by tablespoonfuls as needed, about 6 minutes – it’s a very tender dough, delicious to work with. Place in clean large bowl. Cover with plastic wrap and kitchen towel. Place in warm draft-free area (I use my microwave oven); let rise until light and almost doubled in volume, about 2 1/2 hours.

  3. Filling: Melt butter in heavy medium skillet over medium-high heat. Add brown sugar. Cook until thick grainy sauce forms, about 1 minute. Mix in apples (or peaches). Cook until apples are tender and sauce is reduced to glaze, tossing often, about 7 minutes. Mix in all grated peels and spices. Cool filling at least 30 minutes and up to 3 hours.

  4. Place large sheet of foil on work surface; spray with nonstick spray. Turn dough out onto foil. Roll out to 14x12-inch (35x30cm) rectangle. Sprinkle cookie crumbs in 4-inch-wide (10cm) strip down center, leaving a 1/2-inch border at top and bottom. Arrange apples with any juices atop crumbs. Starting 1/2 inch from each long side of apples, cut straight to edge of dough at 1-inch intervals, making about 13 strips on each side. Fold dough strips alternately and on slight angle over filling, forming lattice. Seal open ends of dough.

  5. Slide foil with dough onto large rimmed baking sheet; trim foil overhang. Cover cake loosely with plastic and towel. Place cake in warm draft-free area; let dough rise until light and puffy, about 1 3/4 hours.

  6. Preheat oven to 375ºF. Bake cake uncovered until golden brown, 30 to 35 minutes. Cool 30 minutes.

  7. Glaze: Mix powdered sugar and 2 tablespoons orange juice in small bowl to blend, adding more juice by 1/2 teaspoonful if too thick. Drizzle glaze over cake. Gently run spatula under cake to loosen from foil. Cut crosswise into slices. Serve slightly warm or at room temperature.


Rainbow Cupakes


Oh my, it has been a little while since my last post! I've been too busy being lazy, and right now I find myself watching my very own copy of The Chronicles of Narnia: The Lion, the Witch and the Wardrobe (I love that movie). And Prince Caspian was really good as well! I can't wait for the rest of the movies to come out! But enough about the movies, let's move on to the subject of this post.

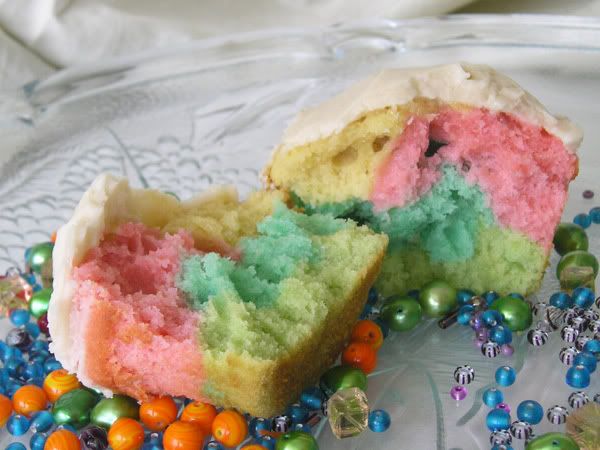
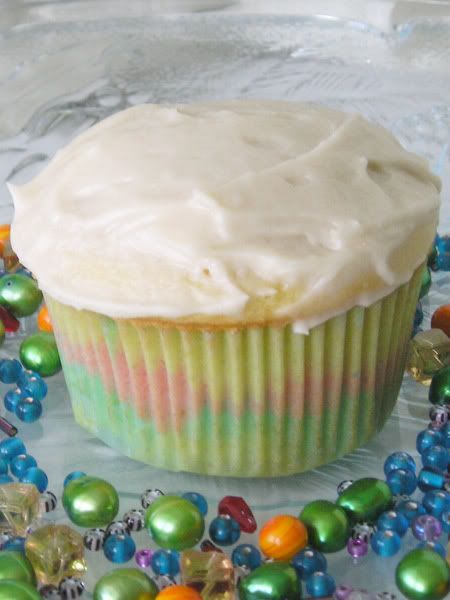
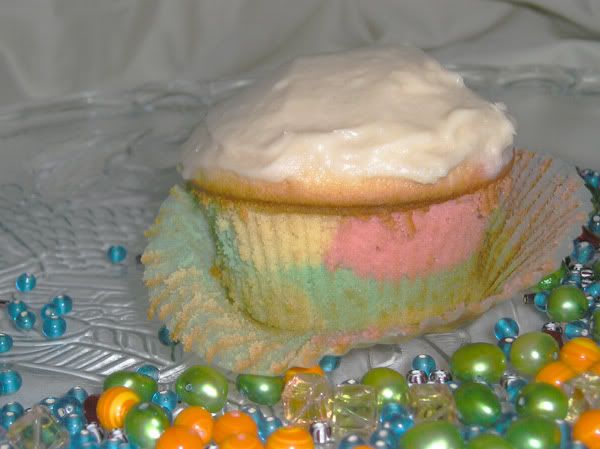
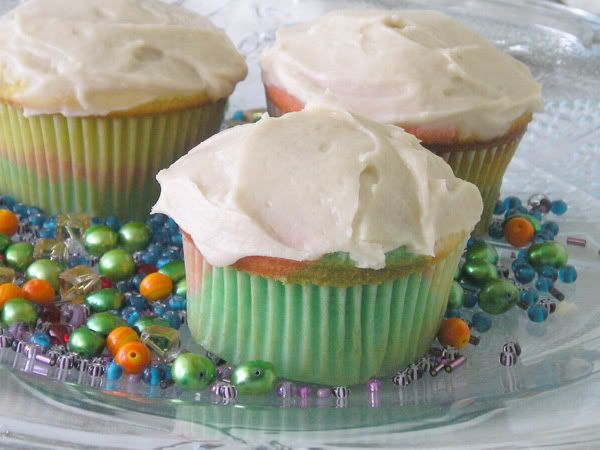
Rainbow cupcakes! These aren't a recent creation though - I made them a few months ago. I got the idea from the Craftster Dessert Forum (Craftster is an awesome site by the way). People were posting all sorts of delicious looking rainbow desserts: cheesecake, cake, cupcakes, sweet popcorn, etc. So I decided to have a go at it myself and I must say, I think they turned out pretty cool. They also tasted good which was an added bonus.

If you're thinking that making rainbow cupcakes sounds difficult have no fear. It's as simple as...cupcakes really. All you need is food coloring and a few extra bowls. I used a fairly thick-battered recipe which I think helped keep the colors separated, but I'm sure any light colored batter would work. Once you have your batter all made up, split it evenly between a few bowls (one bowl for each color) and add food coloring to each.

For my cupcakes I dolloped a tablespoon of each color (I had four colors total) into each cupcake liner and baked them up. I have seen layered cakes (layers of color instead of blobs) as well - I assume their batter was thinner than mine. I just frosted mine with a basic vanilla buttercream frosting and called them done. They were delicious! I'll put down the recipe I used, but as I mentioned any light cake batter should work.

Notes
  1. It's pretty straight forward, no tricks.
The Verdict

Very delicious, especially when freshly frosted. After a few days of sitting around they get tough though.


I found the recipe at the wonderful Coconut & Lime blog (the recipe makes enough batter for an entire cake, so you may want to halve it if you only want a few cupcakes):

Ingredients
  • 3 1/3 cup flour
  • 1 1/3 cup milk
  • 1 1/4 cup sugar
  • 1 cup butter
  • 1/4 cup light brown sugar
  • 1 1/2 Tbsp baking powder
  • 3 Tbsp vanilla paste (I used 1 1/2 Tbsp vanilla extract)
  • 1/2 tsp salt
  • 3 eggs
  • 2 egg yolks
Makes an entire cake.

Directions
  1. Preheat oven to 350. Grease and flour or spray with baking spray two 8 inch round pans.

  2. In a large bowl, beat together butter and sugars until fluffy. Add eggs and egg yolks, mix until well combined. In a medium bowl, whisk together flour, salt and baking powder. Add the vanilla paste to the milk. Mixing continuously, add the flour and milk alternately, beginning and ending with flour.

  3. Divide evenly into the prepared pans and bake about 40 minutes or until the top is golden and a toothpick inserted in the center comes out mostly clean. Cool on wire rack, removing from the pans after about 5 minutes. Cool completely then ice.

And my icing recipe came from Cupcake Project (once again, I substituted the vanilla paste with half the amount of vanilla extract). Yum!


Thursday, July 3, 2008

French Bread


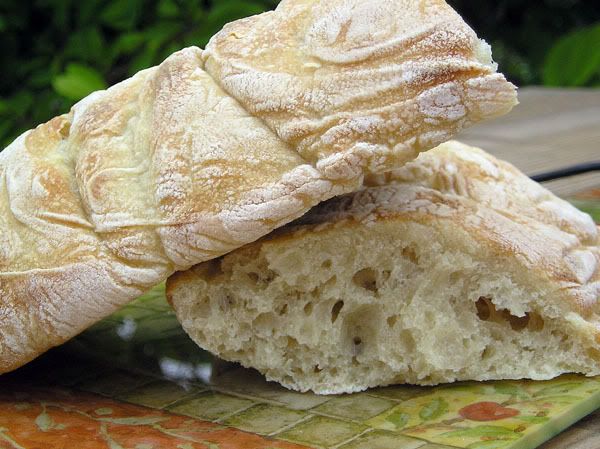
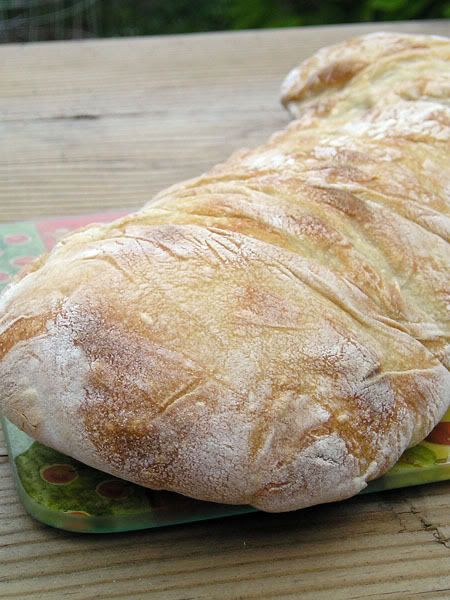
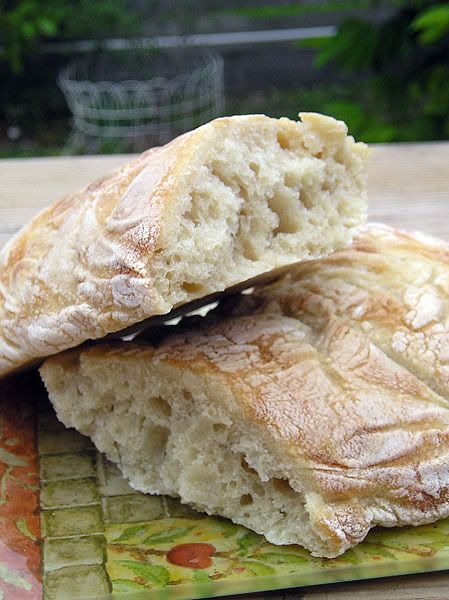
I've never made bread before, so this was interesting. And fun! Don't let me forget to mention that it was fun too. I felt like a real cook with all the little things I had to set-up such as wrapping my bowl in towels for the risings, making a contraption out of a floured pillow case and wine bottles to get that french-bread-shape, and filling hot pans with ice in an attempt to make steam. I had to be creative and use my noggin to figure out how to do some of the things the directions called for! They were very good directions though and helped me figure out how to do most of the steps.

I've never baked anything that has had to rise for as long as or as many times as this bread. Three risings - one of which was about 4 hours long - made me feel like I might actually know what I was doing. I have to admit though, I think I managed to get a nice consistency with my dough which is something I tend to struggle with. In the end though, it just didn't come out quite as I imagine french bread should. I don't know if it was old yeast, lack of adequate steam and cooking surface, or just my lack of skills but the loaves didn't seem to rise much in the last rising and they came out of the oven rather flat and dense. Ok ok, so I did drop one loaf on the floor while transfering it to the baking pan, but still!

Notes
  1. I followed the very very detailed directions as closely as I could and everything worked out well enough for me. They've covered just about any question you could have in the recipe.
The Verdict

Although my attempt didn't end up quite as nicely as I had hoped, I thought it was pretty good! It was best fresh from the oven, but I did take a loaf to my Mom's and we heated it in the oven and dipped it in olive oil with salt, pepper, and parmesan. That was my favorite way to eat it. And although everyone agreed that it was somewhat tough, we finished the whole loaf during that meal. So I would say it was just alright, but would definitely be better if I had more experience with the whole bread making process.

I'm not going to post the recipe here because it is a very long and concise recipe. You're much better off visiting the original site! That being said, here is the recipe from The Sour Dough.


Sunday, June 8, 2008

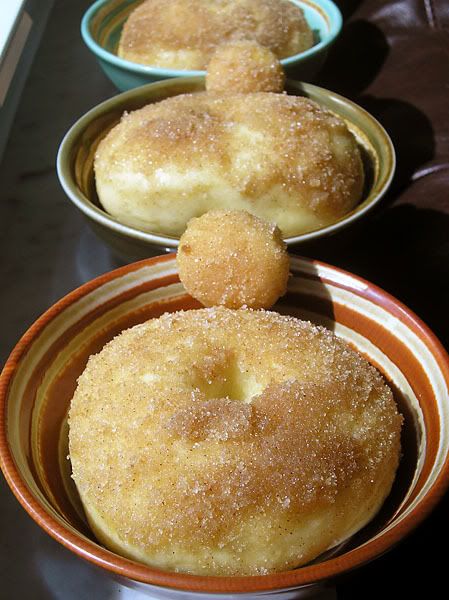
Baked Doughnuts

Baked Doughnuts

I often find myself being bitten by the sweet-bug and wanting to make yummy, delicious, satisfying desserts. This dessert (can a breakfast food be considered a dessert?) didn't require that I go to the store so it was the winner! Besides, I haven't made anything that needed to "rise for one hour" in a while. I always liked coming back and seeing that my dough had grown.

My yeast was...well, it said "best if used by Oct 2007," but I figured it would probably still be fine. I think it was. I do think I added too much flour though. I'm really not sure though - although I have worked with dough like this before, I still don't really know what I'm doing! I don't know if I over-flour my dough or if it's supposed to be sticky and tacky. I think it would be helpful to have one of those mixers with a dough hook, but I don't have that kind of money. I just use my elbow grease!

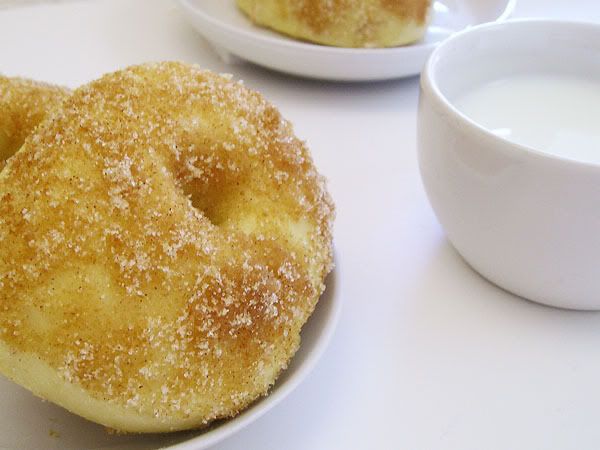
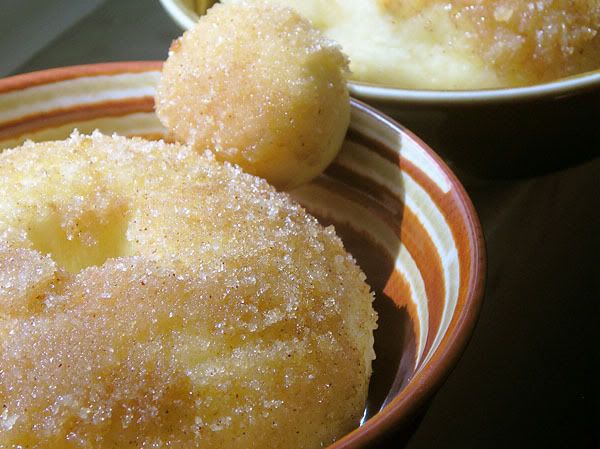
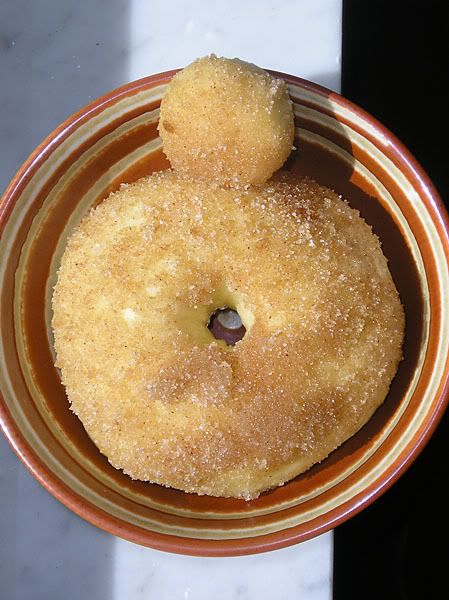
Either way, they came out tasty. Fresh out of the oven and freshly buttered and sugared they're really good! After a day they're a little bit tough, but still good. And if you pop it in the microwave for 10-15 seconds it's even better.

As for how they compare to a "real" doughnut, they are quite different. These basically taste like a pretzel with cinnamon and sugar on top. At least I don't feel quite as guilty eating the baked doughnuts because they're not deep fried... They're still sinful though!

Notes
  1. I added probably 1 cup of extra flour to get a dough that didn't stick to everything... I don't know if that was right or not though. So maybe they would be a little lighter without the extra flour.
  2. I used a plastic cream cheese container as the doughnut-cutter. I cut the top inch of the container off with a knife to get a nice sharp edge. Then I used the cap of a soda bottle to cut out the doughnut hole. Worked pretty well!
  3. I only buttered and sugared one side of the doughnuts and they're almost too sweet, so I don't recommend sugaring both sides.
The Verdict

These are pretty good. They really reminded me of cinnamon buns to be honest. I think they would probably be better if I was better at working with dough too. But they are very tasty! And Mr. C liked them fresh out of the oven, but hasn't been as in love with them since then.

And here is the recipe from 101 Cookbooks:

Baked Doughnuts
Don't over bake these, if anything, under bake them a bit - they will continue baking outside the oven for a few minutes. You want an interior that is moist and tender - not dry. Also, be sure to cut big enough holes in the center of your doughnuts - too small and they will bake entirely shut. Remember they rise, and they rise even more when they are baking. These really need to be made-to-order, but you can make and shape the dough the night before if you want to serve them for brunch. Instructions: after shaping, place doughnuts on baking sheet, cover and place in the refrigerator overnight. Pull them out an hour before baking, and let rise in a warm place before baking.

Ingredients
  • 1 1/3 cups warm milk, 95 to 105 degrees (divided)
  • 1 packet active dry yeast (2 1/4 teaspoons)
  • 2 tablespoons butter
  • 2/3 cup sugar
  • 2 eggs
  • 5 cups all-purpose flour (alternately, white whole wheat might work - haven't tried it yet)
  • A pinch or two of nutmeg, freshly grated
  • 1 teaspoon fine grain sea salt

  • 1/2 cup unsalted butter, melted
  • 1 1/2 cups sugar (I used half white and half brown sugar)
  • 1 tablespoon cinnamon
Makes about 36 doughnuts.

Directions
  1. Place 1/3 cup of the warm milk in the bowl of an electric mixer. Stir in the yeast and set aside for five minutes or so. Be sure your milk isn't too hot or it will kill the yeast. Stir the butter and sugar into the remaining cup of warm milk and add it to the yeast mixture. With a fork, stir in the eggs, flour, nutmeg, and salt - just until the flour is incorporated. With the dough hook attachment of your mixer beat the dough for a few minutes at medium speed. This is where you are going to need to make adjustments - if your dough is overly sticky, add flour a few tablespoons at a time. Too dry? Add more milk a bit at a time. You want the dough to pull away from the sides of the mixing bowl and eventually become supple and smooth. Turn it out onto a floured counter-top, knead a few times (the dough should be barely sticky), and shape into a ball. (Since I don't have a large mixer with a dough hook I used my hands to knead the dough right in the bowl, then kneaded some more on my floured surface)

  2. Transfer the dough to a buttered (or oiled) bowl, cover, put in a warm place (I turn on the oven at this point and set the bowl on top), and let rise for an hour or until the dough has roughly doubled in size.

  3. Punch down the dough and roll it out 1/2-inch thick on your floured countertop. Most people (like myself) don't have a doughnut cutter, instead I use a 2-3 inch cookie cutter to stamp out circles. (Like I mentioned, I used a plastic cream cheese container as my doughnut cutter - you could also maybe use a small bowl). Transfer the circles to a parchment-lined baking sheet and stamp out the smaller inner circles using a smaller cutter. (I used a plastic soda bottle cap). If you cut the inner holes out any earlier, they become distorted when you attempt to move them. Cover with a clean cloth and let rise for another 45 minutes.

  4. Bake in a 375 degree oven until the bottoms are just golden, 8 to 10 minutes - start checking around 8. While the doughnuts are baking, place the butter in a medium bowl. Place the sugar and cinnamon in a separate bowl.

  5. Remove the doughnuts from the oven and let cool for just a minute or two. Dip each one in the melted butter and a quick toss in the sugar bowl. Eat immediately if not sooner.

Baked Doughnuts Baked Doughnuts